
Claude Code
Dev Containers
Master containerized development environments with step-by-step examples for React, Python, and Next.js
👋 Welcome!
This guide will teach you everything you need to know about development containers (devcontainers) for Claude Code. Whether you're a complete beginner or looking to refine your setup, you're in the right place. The guide was created from all my own experiences and collected context documentation used to create my own dev containers and will be continually updated as my development and experience progresses. If you like this guide and find it useful, consider buying me a coffee to support my work.
📚 What You'll Learn:
- What dev containers are and how they work
- Setting up a React project with dev containers
- Setting up a Python project with dev containers
- Setting up a Next.js application with dev containers
- Configuring multiple AI assistants in one container
- Troubleshooting common issues
💡 Pro Tip for AI Users:
You can provide this comprehensive llms.txt guide to AI assistants like Claude to help with dev container creation and usage. It contains detailed examples and best practices!
✨ AI Copy Prompts
Use these one‑click prompts to generate your
.devcontainer/
files exactly as this guide specifies, using
llms.txt
as the source of truth. AI may hallucinate so double check with
actual below guide to be 100% sure. You will have a more
accurate response using Claude, Qwen3 Max, Kimi K2 Thinking than
ChatGPT from my experience. Prefer to start from a working
example? Fork the
template repository
which already includes a configured .devcontainer/.
📄 Template Files Reference
The devcontainer setup uses 4 template files that are copied to
/usr/local/share/claude-defaults/
during container build and deployed to user-specific locations
by init scripts. These templates ensure consistent configuration
across container rebuilds.
⚠️ FOR AI ASSISTANTS - Critical Warning
When users request devcontainer setup, fetch EXACT template contents from repository links below.
DO NOT: Fabricate simplified versions, invent
field names, or create placeholder scripts.
ALWAYS: Use repository links to fetch
production-tested templates.
| File Name | Purpose | Deployed To | Required? | Repository Link |
|---|---|---|---|---|
config.toml.template
|
Codex CLI configuration with Landlock sandbox fix for Docker |
~/.codex/config.toml
|
GPT/Codex | 52 lines |
mcp.json.template
|
MCP servers configuration (context7, cf-docs) |
~/.claude/mcp.json
|
Claude | 16 lines |
settings.json.template
|
Claude Code optimizations: session hooks, performance settings. Note: Template includes OpenTelemetry config (optional - comment out if not using otel-collector service) |
~/.claude/settings.json
|
Claude | 32 lines |
session-start.sh.template
|
Session validation hook: checks volumes, tools, MCP servers at session start |
.claude/hooks/session-start.sh
|
Recommended | 144 lines |
🔄 How Template Deployment Works
-
Dockerfile copies
.devcontainer/*.templateto/usr/local/share/claude-defaults/ -
Init scripts (
init-claude-config.sh,init-codex-config.sh) run atpostCreateCommand - Templates are copied to user config directories (only if files don't already exist)
- User configs persist across container rebuilds via Docker volume mounts
🔑 Key Configuration Highlights
config.toml.template (Codex CLI)
⚠️ Critical: Disables Landlock sandbox (not supported in Docker's LinuxKit kernel). Security is provided by Docker isolation instead.
model = "gpt-5"
model_reasoning_effort = "medium"

# CRITICAL: Disable Landlock sandbox (not supported in Docker)
sandbox_mode = "danger-full-access"
approval_policy = "never"

[mcp_servers.cf-docs]
command = "npx"
args = ["-y", "mcp-remote", "https://docs.mcp.cloudflare.com/sse"]

[mcp_servers.chrome-devtools]
command = "npx"
args = ["-y", "chrome-devtools-mcp@latest", ...]
settings.json.template (Claude Code)
✨ Features: Enables OpenTelemetry metrics export, session start hooks, and optimizes Claude Code performance settings.
{
  "dangerously_skip_permissions": true,
  "verbose": true,
  "hooks": {
    "SessionStart": [{
      "hooks": [{
        "type": "command",
        "command": "\"$CLAUDE_PROJECT_DIR\"/.claude/hooks/session-start.sh"
      }]
    }]
  },
  "env": {
    "MAX_MCP_OUTPUT_TOKENS": "60000",
    "BASH_DEFAULT_TIMEOUT_MS": "300000",
    "CLAUDE_CODE_ENABLE_TELEMETRY": "1",
    "OTEL_EXPORTER_OTLP_ENDPOINT": "http://otel-collector:4317"
  }
}
📋 Quick Reference
-
View templates in container:
ls -la /usr/local/share/claude-defaults/ -
Check deployed configs:
ls -la ~/.claude/ ~/.codex/ - Force redeploy: Delete config file, then run init script manually
-
Customize: Edit deployed files in
~/.claude/or~/.codex/(changes persist via volumes)
📋 Prerequisites
Let's get your development environment ready. You'll need these three tools:
2. Docker Desktop
The engine that runs containers.
Download Docker Desktop →3. Dev Containers Extension
VS Code extension to manage dev containers.
Install from VS Code: Press Cmd+Shift+X (Mac) or Ctrl+Shift+X (Windows/Linux), search "Dev Containers", and click Install.
✓ Verify Installation
Run these commands in your terminal:
# Check Docker is running
docker --version
docker ps

# Check VS Code is installed
code --version
🚀 Quick Start
📋 Prerequisites
Before you can open a project in a dev container, you need a
.devcontainer
folder with configuration files (devcontainer.json,
Dockerfile, etc.).
This guide will show you how to create these files
step-by-step in the sections below.
If you prefer a faster start, you can also use the
prebuilt template repository
which already includes a ready-to-use
.devcontainer
folder.
- Install VS Code, Docker Desktop, and the Dev Containers extension.
- Open your project folder in VS Code.
-
Run Cmd+Shift+P (Mac) or
Ctrl+Shift+P (Win/Linux) →
Dev Containers: Open Folder in Container. -
Wait for first build (5–10 min). Subsequent launches:
Dev Containers: Reopen in Container(≲30s). -
Verify inside the container terminal:
node -v,python -Vor run your app.
# From VS Code Command Palette
Dev Containers: Open Folder in Container

# Verify inside container
node -v
python -V
🤔 What Are Development Containers?
Think of a development container as a complete development workspace in a box. It's like having a fresh computer dedicated just for your project, but it runs inside your current computer!
💡 Real-World Analogy
Imagine you're a chef. Instead of installing every cooking tool and ingredient in your home kitchen (which gets messy and cluttered), a dev container is like having a fully-equipped portable kitchen that appears ready to go whenever you need it, then disappears when you're done. Each recipe (project) gets its own kitchen setup!
How It Works
┌────────────────────────────────────────┐
│    Your Computer (Mac/Windows/Linux)   │
│                                        │
│  ┌───────────────────────────────────┐ │
│  │         VS Code                   │ │
│  │  (Your Editor on the outside)     │ │
│  └───────────────┬───────────────────┘ │
│                  │                     │
│                  │ Connects to         │
│                  ▼                     │
│  ┌───────────────────────────────────┐ │
│  │    Docker Container               │ │
│  │    (Isolated workspace)           │ │
│  │                                   │ │
│  │  * Node.js 22                     │ │
│  │  * Python 3.14 (via uv)           │ │
│  │  * Git, Claude Code, tools        │ │
│  │  * Your project files             │ │
│  └───────────────────────────────────┘ │
└────────────────────────────────────────┘
Key Benefits
Zero Setup
No manual installation of Node.js, Python, or tools. It's all pre-installed!
Isolated
Each project runs in its own container. No conflicts between projects!
Reproducible
Same setup on every computer. "Works on my machine" problems disappear!
Disposable
Delete and rebuild anytime without losing your configuration files.
✅ Why Use Development Containers?
For Individual Developers
- Clean Host System: Your computer stays clean - no installing dozens of tools globally
- Multiple Environments: Work on Python 3.9 and Python 3.14 projects simultaneously without conflicts
- Consistency: Same setup works perfectly on Mac, Windows, and Linux
For Teams
- Fast Onboarding: New team members coding in minutes instead of hours/days
- Standardization: Everyone uses the exact same tool versions
- Documentation as Code: Setup is version-controlled and documented automatically
⚠️ When NOT to Use Dev Containers
Dev containers aren't always the best solution. Here's when to skip them:
-
Simple Scripts: For a single Python script or small Node.js file, just run it locally
-
GUI Applications: Desktop apps requiring native UI don't work well in containers
-
Hardware Access: USB devices, GPUs, specialized hardware need complex setup
-
Resource-Constrained Machines: Docker overhead (1-2GB RAM) may be too much for older computers
Better alternatives: For simple projects, use
nvm,
pyenv, or
rbenv
for version management.
🏗️ Architecture Overview
A dev container consists of three main components working together:
📄 devcontainer.json
The configuration file that tells VS Code how to connect to your container.
- Defines which extensions to install
- Sets environment variables
- Configures port forwarding
- Specifies post-creation commands
🐳 Dockerfile
The blueprint that defines what's installed inside your container.
- Specifies base image (e.g., Node.js 22, Python 3.14)
- Installs system packages and tools
- Sets up users and permissions
- Configures the shell environment
⚙️ Init Scripts (Optional)
Automation scripts that run after the container starts.
- Initialize tool configurations
- Set up security policies
- Prepare the development environment
📁 File Structure Example
your-project/
├── .devcontainer/
│   ├── devcontainer.json           # VS Code configuration
│   ├── Dockerfile                  # Container blueprint
│   ├── init-claude-config.sh       # Claude Code auto-config
│   ├── init-claude-hooks.sh        # Hook deployment script
│   ├── init-codex-config.sh        # Codex CLI auto-config
│   ├── init-firewall.sh            # Network security
│   ├── session-start.sh.template   # Session hook template
│   ├── settings.json.template      # Claude settings
│   ├── mcp.json.template           # MCP servers
│   └── config.toml.template        # Codex configuration
├── .gitignore
├── README.md
└── [your project files]
🔒 Security & Firewall Setup
Production dev containers should implement network security with iptables firewall configuration. This creates a default-deny security posture where only explicitly allowed domains can be accessed.
⚠️ Advanced Section: If you're new to dev containers, you can skip this section and jump to Claude Code Configuration. Return here when you need production-grade security.
⚠️ Security Architecture:
- Default-deny policy: All outbound traffic blocked by default
- Allowlist-based: Only whitelisted domains (npm, GitHub, AI APIs) permitted
- IPv6 disabled: Prevents bypassing IPv4 firewall rules
- Docker-aware: Preserves inter-container communication
- Startup verification: Validates rules and tests connectivity
📚 Why Firewall for Dev Containers?
According to Claude's official documentation on sandboxing, network isolation is a core security layer. The firewall provides:
- Protection against data exfiltration to untrusted domains
- Controlled access to package registries and AI APIs
- Defense-in-depth alongside other security measures
- Audit trail of allowed network destinations
🛡️ Three-Layer Security Architecture:
This implementation provides maximum compatibility across Docker environments through defense-in-depth:
- Layer 1 (Container Creation): Disable IPv6 via sysctl flags at container startup (most reliable)
- Layer 2 (Runtime): Attempt IPv6 disable in init script with graceful degradation (warning, not failure)
- Layer 3 (Firewall Backup): ip6tables DROP rules block all IPv6 traffic if still enabled
Result: Container starts successfully in any environment while maintaining security through at least one layer.
Implementation Components
1. Docker Capabilities in devcontainer.json
Add these runArgs to grant minimal capabilities
needed for firewall management with three-layer IPv6 security:
"runArgs": [
  "--cap-drop=ALL",                              // Drop all capabilities first
  "--cap-add=NET_ADMIN",                         // Required for iptables/sysctl
  "--cap-add=NET_RAW",                           // Required for packet filtering
  "--cap-add=SETUID",                            // Required for sudo operations
  "--cap-add=SETGID",                            // Required for group switching
  "--cap-add=SYS_ADMIN",                         // Required for kernel parameters
  "--sysctl=net.ipv6.conf.all.disable_ipv6=1",   // Layer 1: IPv6 at creation
  "--sysctl=net.ipv6.conf.default.disable_ipv6=1",
  "--sysctl=net.ipv6.conf.lo.disable_ipv6=1"
],
"postStartCommand": "sudo /usr/local/bin/init-firewall.sh"
2. init-firewall.sh Script
Create this script in your
.devcontainer/ directory. It will be copied to
/usr/local/bin/ during container build:
#!/bin/bash
set -euo pipefail
IFS=$'\n\t'

STATE_FILE="/var/lib/firewall-configured"

# Disable IPv6 to prevent bypass
echo "Disabling IPv6..."
sysctl -w net.ipv6.conf.all.disable_ipv6=1 >/dev/null 2>&1 || true
sysctl -w net.ipv6.conf.default.disable_ipv6=1 >/dev/null 2>&1 || true
sysctl -w net.ipv6.conf.lo.disable_ipv6=1 >/dev/null 2>&1 || true

# Check if already configured
if [ -f "$STATE_FILE" ]; then
    echo "Firewall already configured, skipping..."
    exit 0
fi

echo "Starting firewall configuration..."

# Initialize DNS resolution statistics
TOTAL_DOMAINS=0
RESOLVED_DOMAINS=0
FAILED_DOMAINS=0

# Extract Docker DNS before flushing
DOCKER_DNS_RULES=$(iptables-save -t nat | grep "127\.0\.0\.11" || true)

# Detect Docker networks
echo "Detecting Docker networks..."
DOCKER_NETWORKS=$(ip -o -f inet addr show | grep -v "127.0.0.1" | awk '{print $4}')

if [ -z "$DOCKER_NETWORKS" ]; then
    echo "ERROR: Failed to detect Docker networks"
    exit 1
fi

# Create ipset for allowed domains
ipset destroy allowed-domains 2>/dev/null || true
ipset create allowed-domains hash:net

# Fetch GitHub IP ranges
echo "Fetching GitHub IP ranges..."
gh_ranges=$(curl -s https://api.github.com/meta)
if [ -z "$gh_ranges" ]; then
    echo "ERROR: Failed to fetch GitHub IP ranges"
    exit 1
fi

echo "Processing GitHub IPs..."
while read -r cidr; do
    echo "Adding GitHub range $cidr"
    ipset add allowed-domains "$cidr" -exist
done < <(echo "$gh_ranges" | jq -r '(.web + .api + .git)[]' | aggregate -q)

# Add Anthropic IP ranges (official published ranges)
echo "Adding Anthropic IP ranges..."
echo "Adding Anthropic CIDR range 160.79.104.0/23"
ipset add allowed-domains "160.79.104.0/23" -exist

# Add Anthropic specific IP addresses
for ip in "34.162.46.92" "34.162.102.82" "34.162.136.91" "34.162.142.92" "34.162.183.95"; do
    echo "Adding Anthropic IP $ip"
    ipset add allowed-domains "$ip" -exist
done

# Fetch and add Google Cloud/API IP ranges
echo "Fetching Google Cloud/API IP ranges..."
goog_ranges=$(curl -s https://www.gstatic.com/ipranges/goog.json)
if [ -z "$goog_ranges" ]; then
    echo "ERROR: Failed to fetch Google IP ranges"
    exit 1
fi

echo "Processing Google IPs..."
while read -r cidr; do
    echo "Adding Google range $cidr"
    ipset add allowed-domains "$cidr" -exist
done < <(echo "$goog_ranges" | jq -r '.prefixes[].ipv4Prefix | select(. != null)')

# Fetch and add Cloudflare CDN IP ranges
echo "Fetching Cloudflare CDN IP ranges..."
cf_ranges=$(curl -s https://api.cloudflare.com/client/v4/ips)
if [ -z "$cf_ranges" ]; then
    echo "ERROR: Failed to fetch Cloudflare IP ranges"
    exit 1
fi

echo "Processing Cloudflare IPs..."
while read -r cidr; do
    echo "Adding Cloudflare range $cidr"
    ipset add allowed-domains "$cidr" -exist
done < <(echo "$cf_ranges" | jq -r '.result.ipv4_cidrs[]')

# Fetch and add AWS IP ranges (covers many AI services: Hugging Face, Replicate, etc.)
# Filtered for US East/West regions and EC2/CloudFront services only to limit allowlist size
echo "Fetching AWS IP ranges..."
aws_ranges=$(curl -s https://ip-ranges.amazonaws.com/ip-ranges.json)
if [ -z "$aws_ranges" ]; then
    echo "ERROR: Failed to fetch AWS IP ranges"
    exit 1
fi

echo "Processing AWS IPs (US regions: us-east-1, us-west-2; Services: EC2, CLOUDFRONT)..."
while read -r cidr; do
    echo "Adding AWS range $cidr"
    ipset add allowed-domains "$cidr" -exist
done < <(echo "$aws_ranges" | jq -r '.prefixes[] | select(.region == "us-east-1" or .region == "us-west-2") | select(.service == "EC2" or .service == "CLOUDFRONT") | .ip_prefix' | aggregate -q)

# Resolve and add allowed domains (defense-in-depth: includes DNS backup for services above)
for domain in \
    "dns.google" \
    "1.1.1.1" \
    "8.8.8.8" \
    "8.8.4.4" \
    "auth.openai.com" \
    "chatgpt.com" \
    "context7.com" \
    "unpkg.com" \
    "cdn.jsdelivr.net" \
    "cdnjs.cloudflare.com" \
    "github.com" \
    "api.github.com" \
    "raw.githubusercontent.com" \
    "github.githubassets.com" \
    "collector.github.com" \
    "ghcr.io" \
    "pkg-containers.githubusercontent.com" \
    "nodejs.org" \
    "registry.npmjs.org" \
    "pypi.org" \
    "files.pythonhosted.org" \
    "astral.sh" \
    "bun.sh" \
    "crates.io" \
    "static.crates.io" \
    "index.crates.io" \
    "docker.io" \
    "registry-1.docker.io" \
    "auth.docker.io" \
    "production.cloudflare.docker.com" \
    "api.anthropic.com" \
    "api.openai.com" \
    "aistudio.google.com" \
    "accounts.google.com" \
    "oauth2.googleapis.com" \
    "www.googleapis.com" \
    "storage.googleapis.com" \
    "content.googleapis.com" \
    "generativelanguage.googleapis.com" \
    "sentry.io" \
    "statsig.anthropic.com" \
    "statsig.com" \
    "marketplace.visualstudio.com" \
    "vscode.blob.core.windows.net" \
    "update.code.visualstudio.com" \
    "docs.mcp.cloudflare.com" \
    "mcp.context7.com" \
    "vercel.com" \
    "ui.shadcn.com" \
    "tailwindcss.com" \
    "radix-ui.com" \
    "react.dev" \
    "reactjs.org" \
    "esm.sh" \
    "lucide.dev" \
    "openrouter.ai" \
    "api.cerebras.ai" "inference.cerebras.ai" "cloud.cerebras.ai" "cerebras.ai" \
    "dashscope.aliyuncs.com" "qwen.ai" "qwenlm.ai" "aliyuncs.com" "alibabacloud.com" \
    "cn-hangzhou.aliyuncs.com" "us-west-1.aliyuncs.com" "ap-southeast-1.aliyuncs.com" \
    "api.minimax.chat" "minimax.chat" \
    "z.ai" \
    "api.cohere.ai" "cohere.ai" \
    "api.together.xyz" "together.xyz" \
    "api.replicate.com" "replicate.com" \
    "api-inference.huggingface.co" "huggingface.co" \
    "api.perplexity.ai" "perplexity.ai" \
    "api.mistral.ai" "mistral.ai" \
    "api.deepinfra.com" "deepinfra.com" \
    "api.fireworks.ai" "fireworks.ai" \
    "api.groq.com" "groq.com" \
    "api.lepton.ai" "lepton.ai" \
    "mancer.tech" "api.mancer.tech" \
    "api.deepseek.com" "deepseek.com" \
    "api.lingyiwanwu.com" "platform.lingyiwanwu.com"; do

    # Check if IP address
    if [[ "$domain" =~ ^[0-9]{1,3}\.[0-9]{1,3}\.[0-9]{1,3}\.[0-9]{1,3}$ ]]; then
        echo "Adding IP $domain"
        ipset add allowed-domains "$domain" -exist
        continue
    fi

    # Resolve hostname with graceful error handling
    TOTAL_DOMAINS=$((TOTAL_DOMAINS + 1))
    echo "Resolving $domain..."
    ips=$(dig +noall +answer A "$domain" | awk '$4 == "A" {print $5}')
    if [ -z "$ips" ]; then
        echo "WARNING: Failed to resolve $domain (continuing...)"
        FAILED_DOMAINS=$((FAILED_DOMAINS + 1))
        continue
    fi

    # Successfully resolved, add IPs to allowlist
    domain_resolved=false
    while read -r ip; do
        if [[ ! "$ip" =~ ^[0-9]{1,3}\.[0-9]{1,3}\.[0-9]{1,3}\.[0-9]{1,3}$ ]]; then
            echo "WARNING: Invalid IP from DNS for $domain: $ip (skipping)"
            continue
        fi
        echo "Adding $ip for $domain"
        ipset add allowed-domains "$ip" -exist
        domain_resolved=true
    done < <(echo "$ips")

    # Count as resolved only if at least one valid IP was added
    if [ "$domain_resolved" = true ]; then
        RESOLVED_DOMAINS=$((RESOLVED_DOMAINS + 1))
    else
        FAILED_DOMAINS=$((FAILED_DOMAINS + 1))
    fi
done

echo ""
echo "IP allowlist built successfully"
echo "DNS Resolution Summary: ${RESOLVED_DOMAINS}/${TOTAL_DOMAINS} domains resolved successfully"
if [ "$FAILED_DOMAINS" -gt 0 ]; then
    echo "  WARNING: ${FAILED_DOMAINS} domains failed to resolve"
fi
echo ""

# Flush iptables
echo "Flushing iptables..."
iptables -F
iptables -X
iptables -t nat -F
iptables -t nat -X
iptables -t mangle -F
iptables -t mangle -X

# Restore Docker DNS
if [ -n "$DOCKER_DNS_RULES" ]; then
    echo "Restoring Docker DNS..."
    iptables -t nat -N DOCKER_OUTPUT 2>/dev/null || true
    iptables -t nat -N DOCKER_POSTROUTING 2>/dev/null || true
    echo "$DOCKER_DNS_RULES" | xargs -L 1 iptables -t nat
fi

# Configure base rules
echo "Configuring base rules..."
iptables -A OUTPUT -p udp --dport 53 -j ACCEPT
iptables -A INPUT -p udp --sport 53 -j ACCEPT
iptables -A OUTPUT -p tcp --dport 22 -j ACCEPT
iptables -A INPUT -p tcp --sport 22 -m state --state ESTABLISHED -j ACCEPT
iptables -A INPUT -i lo -j ACCEPT
iptables -A OUTPUT -o lo -j ACCEPT

# Allow Docker networks
echo "Allowing Docker networks..."
while read -r network; do
    echo "  Allowing: $network"
    iptables -A INPUT -s "$network" -j ACCEPT
    iptables -A OUTPUT -d "$network" -j ACCEPT
done < <(echo "$DOCKER_NETWORKS")

# Set default-deny policies
echo "Setting default-deny policies..."
iptables -P INPUT DROP
iptables -P FORWARD DROP
iptables -P OUTPUT DROP

# Allow established connections
iptables -A INPUT -m state --state ESTABLISHED,RELATED -j ACCEPT
iptables -A OUTPUT -m state --state ESTABLISHED,RELATED -j ACCEPT

# Allow whitelisted domains
iptables -A OUTPUT -m set --match-set allowed-domains dst -j ACCEPT

# Reject all other traffic
iptables -A OUTPUT -j REJECT --reject-with icmp-admin-prohibited

# Configure IPv6 firewall rules (Layer 3 - Defense-in-depth)
echo "Configuring IPv6 firewall rules..."
ip6tables -P INPUT DROP 2>/dev/null || echo "  Note: IPv6 may already be disabled"
ip6tables -P FORWARD DROP 2>/dev/null || true
ip6tables -P OUTPUT DROP 2>/dev/null || true
ip6tables -A INPUT -i lo -j ACCEPT 2>/dev/null || true
ip6tables -A OUTPUT -o lo -j ACCEPT 2>/dev/null || true
ip6tables -A INPUT -m state --state ESTABLISHED,RELATED -j ACCEPT 2>/dev/null || true
ip6tables -A OUTPUT -m state --state ESTABLISHED,RELATED -j ACCEPT 2>/dev/null || true
ip6tables -A INPUT -j REJECT 2>/dev/null || true
ip6tables -A OUTPUT -j REJECT 2>/dev/null || true
echo "IPv6 firewall rules configured"

echo ""
echo "Firewall configuration complete!"
echo ""

# Verify firewall
echo "Verifying firewall..."

# Check IPv6 disabled (warning only, not fatal)
if sysctl net.ipv6.conf.all.disable_ipv6 | grep -q "= 1"; then
    echo "✓ IPv6 disabled"
else
    echo "⚠ WARNING: IPv6 is still enabled (container restrictions may prevent disabling)"
    echo "  IPv6 traffic will be blocked by ip6tables rules as a security fallback"
    echo "  This is expected in some Docker environments and does not affect security"
fi

# Check blocked domains
if curl --connect-timeout 5 https://example.com >/dev/null 2>&1; then
    echo "✗ Firewall failed - can reach example.com"
    exit 1
else
    echo "✓ Blocked example.com as expected"
fi

# Check allowed domains
if ! curl --connect-timeout 5 https://api.github.com/zen >/dev/null 2>&1; then
    echo "✗ Cannot reach api.github.com"
    exit 1
else
    echo "✓ Can reach api.github.com as expected"
fi

# Verify OpenRouter API access
if ! curl --connect-timeout 5 https://openrouter.ai/api/v1/models >/dev/null 2>&1; then
    echo "✗ Cannot reach OpenRouter"
    exit 1
else
    echo "✓ Can reach OpenRouter as expected"
fi

# Verify Cerebras API access
if ! curl --connect-timeout 5 https://api.cerebras.ai/v1/models >/dev/null 2>&1; then
    echo "✗ Cannot reach Cerebras"
    exit 1
else
    echo "✓ Can reach Cerebras as expected"
fi

# Mark as configured
touch "$STATE_FILE"
echo "Firewall configured successfully!"
🔑 Key Features:
- Three-layer IPv6 security: Container creation, runtime disable, ip6tables backup
- Graceful degradation: Container starts successfully even if IPv6 can't be disabled
- Maximum compatibility: Works across Docker Desktop, Podman, cloud environments
- Idempotent: Uses state file to skip if already configured
- Dynamic IP range fetching: Fetches official IP ranges from GitHub, Anthropic, Google, Cloudflare, and AWS APIs
- AWS IP ranges: Filtered for US regions (us-east-1, us-west-2) and EC2/CloudFront services to support AWS-hosted AI services (Hugging Face, Replicate)
- Resilient DNS resolution: Warns on DNS failures instead of failing container startup, tracks resolution statistics (e.g., "98/102 domains resolved")
- 100+ AI service domains: Comprehensive coverage including OpenRouter, Cerebras, Qwen/Alibaba, Minimax, z.ai, Cohere, Together.ai, Replicate, Hugging Face, Perplexity, Mistral, DeepInfra, Fireworks, Groq, Lepton, DeepSeek, 01.AI (Yi models)
- DNS resolution backup: Defense-in-depth approach with DNS resolution for all domains (including those with IP ranges)
- Docker preservation: Maintains inter-container communication
- Self-testing: Verifies blocked domains and tests connectivity to GitHub, OpenRouter, and Cerebras APIs
3. Dockerfile Integration
Add these lines to your Dockerfile to install the script and configure sudo:
# Copy firewall script
COPY init-firewall.sh /usr/local/bin/

# Set permissions and configure sudoers
RUN chmod +x /usr/local/bin/init-firewall.sh && \
    echo "node ALL=(root) NOPASSWD: /usr/local/bin/init-firewall.sh" > /etc/sudoers.d/node-firewall && \
    chmod 0440 /etc/sudoers.d/node-firewall
🛡️ Security Considerations:
- Three-layer defense: Multiple security layers ensure protection even if one fails
- IPv6 handling: If IPv6 can't be disabled (Docker limitations), ip6tables provides equivalent security
- Not foolproof: Firewall provides defense-in-depth but is not a complete security solution
- Trusted repos only: Only use dev containers with repositories you trust
-
Bypass flag:
--dangerously-skip-permissionsbypasses security checks - use with caution - Customization: Add your project's specific domains to the allowlist as needed
- Performance: One-time ~10-30 second startup overhead for DNS resolution and rule configuration
🔐 Git Safety and Branch Protection
Prevent accidental commits to protected branches
(main/
master) using a pre-commit git hook. This provides
technical enforcement that blocks commits
before they reach the repository.
⚠️ Why Git Hooks?
Git hooks are stored in .git/hooks/ which is
not tracked by git. This means:
- Hooks don't transfer when cloning the repository
- Must be installed manually after cloning or rebuilding
- Provide technical enforcement (not just guidance)
Installation Steps
Step 1: Create setup script
Create
.devcontainer/setup-git-hooks.sh:
#!/bin/bash
#
# Setup Git Hooks
#
# Installs git hooks for branch protection and safety.
# Run this after cloning the repository or rebuilding the container.
#

# Strict error handling
set -euo pipefail

# Dynamically resolve repository root
SCRIPT_DIR="$(cd "$(dirname "${BASH_SOURCE[0]}")" && pwd)"
REPO_ROOT="$(cd "$SCRIPT_DIR/.." && pwd)"
HOOKS_DIR="$REPO_ROOT/.git/hooks"

# Validate git repository
if [ ! -d "$REPO_ROOT/.git" ]; then
    echo "❌ ERROR: Not a git repository"
    echo "Current directory: $(pwd)"
    echo "Expected .git at: $REPO_ROOT/.git"
    exit 1
fi

# Validate hooks directory is writable
if [ -d "$HOOKS_DIR" ] && [ ! -w "$HOOKS_DIR" ]; then
    echo "❌ ERROR: Hooks directory is not writable: $HOOKS_DIR"
    exit 1
fi

echo "=== Git Hooks Setup ==="
echo ""

# Create hooks directory if it doesn't exist
if [ ! -d "$HOOKS_DIR" ]; then
    echo "Creating hooks directory..."
    mkdir -p "$HOOKS_DIR"
fi

# Install pre-commit hook
echo "Installing pre-commit hook..."
cat > "$HOOKS_DIR/pre-commit" << 'EOF'
#!/bin/bash
#
# Git Pre-Commit Hook: Branch Protection
#
# Prevents direct commits to main/master branches.
# Encourages feature branch workflow for safety.
#

BRANCH=$(git branch --show-current)

# Block commits to protected branches
if [ "$BRANCH" = "main" ] || [ "$BRANCH" = "master" ]; then
    echo ""
    echo "❌ ERROR: Direct commits to '$BRANCH' are not allowed"
    echo ""
    echo "This is a safety measure to protect your work."
    echo ""
    echo "📝 Create a feature branch instead:"
    echo "   git checkout -b feature/your-feature-name"
    echo ""
    echo "Or for session-based work:"
    echo "   git checkout -b session/$(date +%Y%m%d-%H%M)-description"
    echo ""
    exit 1
fi

# Success - allow commit
echo "✅ Committing to branch: $BRANCH"
exit 0
EOF

chmod +x "$HOOKS_DIR/pre-commit"

echo "✅ Pre-commit hook installed"
echo ""

# Verify installation
if [ -x "$HOOKS_DIR/pre-commit" ]; then
    echo "✅ Hook is executable"
else
    echo "❌ Hook is not executable!"
    exit 1
fi

echo ""
echo "=== Setup Complete ==="
echo ""
echo "Git hooks have been installed successfully."
echo ""
🔧 Key Features of setup-git-hooks.sh
1. Dynamic Path Resolution
Script automatically detects repository root regardless of clone location:
                            SCRIPT_DIR="$(cd "$(dirname "${BASH_SOURCE[0]}")" &&
                            pwd)"

                            REPO_ROOT="$(cd "$SCRIPT_DIR/.." && pwd)"

                            HOOKS_DIR="$REPO_ROOT/.git/hooks"
- Works with any repository path (not hard-coded)
- Portable across different environments
- Resolves paths relative to script location
2. Strict Error Handling
set -euo pipefail
ensures robust script execution:
-
-e: Exit immediately if any command fails -
-u: Treat unset variables as errors -
-o pipefail: Catch failures in piped commands
3. Validation Checks
Script validates prerequisites before installation:
- Verifies
.gitdirectory exists - Checks hooks directory is writable
- Provides clear error messages with diagnostics
Step 2: Automatic Installation (Recommended)
✅ Automatic Installation
The git hook is automatically installed on every container
start via the postStartCommand in
devcontainer.json. No manual setup required!
                        "postStartCommand": "... && bash
                        ${containerWorkspaceFolder}/.devcontainer/setup-git-hooks.sh"
This ensures hooks are always present after container rebuilds or fresh clones.
Benefits:
- No manual installation required after container rebuild
- Hooks always present in fresh clones
- Consistent enforcement across team members
- Zero-friction developer experience
Manual Installation (if not configured):
If automatic installation is not set up, run manually after cloning or rebuilding:
# From repository root
bash .devcontainer/setup-git-hooks.sh
Expected output:
=== Git Hooks Setup ===

Installing pre-commit hook...
✅ Pre-commit hook installed

✅ Hook is executable

=== Setup Complete ===

Git hooks have been installed successfully.
Testing the Hook
Test 1: Verify hook blocks commits to main
# Switch to main branch
git checkout main

# Try to commit (should be blocked)
echo "test" > /tmp/test-hook.txt
git add /tmp/test-hook.txt
git commit -m "test"
Expected output (hook blocks commit):
❌ ERROR: Direct commits to 'main' are not allowed

This is a safety measure to protect your work.

📝 Create a feature branch instead:
   git checkout -b feature/your-feature-name

Or for session-based work:
   git checkout -b session/20251029-1430-description
Test 2: Verify hook allows commits to feature branches
# Create and switch to feature branch
git checkout -b feature/test-hook

# Commit should succeed
git add /tmp/test-hook.txt
git commit -m "test commit"
Expected output (hook allows commit):
✅ Committing to branch: feature/test-hook
[feature/test-hook abc1234] test commit
 1 file changed, 1 insertion(+)
Troubleshooting
🔍 Hook not blocking commits to main?
Verify the hook is installed and executable:
# Check if hook exists and is executable
ls -la .git/hooks/pre-commit

# Should show: -rwxr-xr-x (executable permission)
If hook is missing or not executable, run the setup script manually:
bash .devcontainer/setup-git-hooks.sh⚠️ Setup script fails or shows errors?
Check the installation log (if configured):
# If postStartCommand logs to file
cat /tmp/git-hooks-install.log
Common issues:
- Not a git repository: Ensure you're in the repository root
-
Permission denied: Check file permissions with
ls -la .devcontainer/setup-git-hooks.sh -
Script not executable: Run
chmod +x .devcontainer/setup-git-hooks.sh
🧪 Test the hook manually
You can run the hook script directly to verify it works:
# Test the hook directly
bash .git/hooks/pre-commit

# Should show:
# ✅ Committing to branch: [your-current-branch]
# OR
# ❌ ERROR: Direct commits to 'main' are not allowed
🚨 Bypass hook (emergency only)
If you absolutely must commit to main/master (not recommended):
git commit --no-verify -m "your message"
⚠️ Warning: Only use --no-verify when
absolutely necessary. It bypasses all git hooks and safety
checks.
Pre-Work Sync Check (MANDATORY)
⚠️ ALWAYS Check Before Creating Branches
Before creating any new feature or session branch, you MUST ensure your local master branch is up-to-date with the remote. This prevents working on outdated code and reduces merge conflicts.
Step 1: Check Your Sync Status
# 1. Switch to master (if not already there)
git checkout master

# 2. Fetch latest changes from remote (safe, doesn't merge)
git fetch origin

# 3. Check sync status
git status
Step 2: Interpret Status and Take Action
✅ Scenario 1: Up to Date
Status shows:
"Your branch is up to date with 'origin/master'"
→ Safe to proceed! Create your branch:
git checkout -b feature/your-feature-name
# OR
git checkout -b session/$(date +%Y%m%d-%H%M)-description
⚠️ Scenario 2: Behind Remote
Status shows:
"Your branch is behind 'origin/master' by X
                        commits"
→ Pull first, then verify:
# Pull latest changes
git pull origin master

# Verify sync status
git status  # Should now show "up to date"

# Now create your branch
git checkout -b feature/your-feature-name
❌ Scenario 3: Diverged from Remote
Status shows:
"Your branch and 'origin/master' have diverged"
→ Resolve divergence before creating branch:
Option 1: If you have NO local commits on master (safe):
# Force sync with remote (discards local changes)
git reset --hard origin/master

# Verify
git status  # Should show "up to date"
Option 2: If you have local commits to preserve:
# Option A: Merge (creates merge commit)
git pull origin master

# Option B: Rebase (linear history)
git rebase origin/master

# Resolve any conflicts, then verify
git status
💡 Why This Matters
- ✅ Ensures your feature branch is based on the latest code
- ✅ Prevents building on outdated codebase (which leads to conflicts)
- ✅ Reduces merge conflicts when creating your PR
- ✅ Ensures tests/CI run against current codebase state
- ✅ Prevents duplicating work that others already merged
- ✅ Maintains clean, linear git history
Complete Workflow: From Master to New Branch
# Step-by-step workflow
git checkout master              # Switch to master
git fetch origin                 # Download latest info
git status                       # Check if behind
git pull origin master           # Pull if needed (only if behind)
git status                       # Verify "up to date"
git checkout -b feature/new-api  # Create branch
git branch --show-current        # Verify: "feature/new-api"

# ✅ Now safe to start work!
Branch Naming Conventions
Feature Branches (long-term work)
feature/add-authentication
feature/update-api
fix/broken-login
refactor/clean-up-code
Session Branches (exploratory work)
session/20251029-1045-add-firewall
session/20251029-1430-fix-bug
session/20251029-1600-update-docs
Format: session/YYYYMMDD-HHMM-description
🔧 Troubleshooting
Problem: Hook doesn't block commits
Check if hook is installed:
test -x .git/hooks/pre-commit && echo "✅ Installed" ||
                        echo "❌ Missing"
Problem: Permission denied error
Make hook executable:
chmod +x .git/hooks/pre-commit
Problem: Emergency fix needed on main
Better approach: Create hotfix branch:
git checkout -b hotfix/critical-fix
Bypass (NOT recommended):
git commit --no-verify
💡 How It Works
-
Git automatically runs
.git/hooks/pre-commitbefore every commit -
Hook reads current branch name with
git branch --show-current -
If branch is
mainormaster, hook exits with code 1 (blocks commit) -
Users can override with
--no-verifyflag if absolutely necessary
⚙️ Claude Code Configuration & MCP
Automatically configure Claude Code settings and MCP (Model Context Protocol) servers on container startup. This provides enhanced functionality like library documentation lookup and Cloudflare-specific help.
💡 What is MCP?
Model Context Protocol (MCP) extends Claude Code with specialized capabilities through remote servers. Think of it like installing plugins that give Claude instant access to documentation and APIs.
- context7: Look up up-to-date library documentation (React, Next.js, Supabase, MongoDB, etc.)
- cf-docs: Search Cloudflare documentation (Workers, Pages, R2, D1, etc.)
The init-claude-config.sh Script
This script automatically sets up Claude Code configuration on container startup by:
-
Creating
.claudedirectory if it doesn't exist - Copying MCP server configuration for context7 and cf-docs
- Copying settings template with optimized environment variables
- Ensuring npm global directory structure exists (required for npx with MCP)
- Preserving user settings if they already exist (won't overwrite)
1. Create init-claude-config.sh
Save this script in your
.devcontainer
directory:
#!/bin/bash
set -euo pipefail

CLAUDE_HOME="/home/node/.claude"
MCP_FILE="$CLAUDE_HOME/mcp.json"
MCP_TEMPLATE="/usr/local/share/claude-defaults/mcp.json"
SETTINGS_TEMPLATE="/usr/local/share/claude-defaults/settings.json"

echo "Initializing Claude Code configuration..."

# Create .claude directory if it doesn't exist
if [ ! -d "$CLAUDE_HOME" ]; then
    echo "Creating $CLAUDE_HOME directory..."
    mkdir -p "$CLAUDE_HOME"
    chown node:node "$CLAUDE_HOME"
fi

# Copy MCP configuration if it doesn't exist
if [ ! -f "$MCP_FILE" ]; then
    if [ -f "$MCP_TEMPLATE" ]; then
        echo "Copying MCP server configuration..."
        cp "$MCP_TEMPLATE" "$MCP_FILE"
        chown node:node "$MCP_FILE"
        echo "✓ MCP servers configured:"
        echo "  - context7 (npx @upstash/context7-mcp with API key)"
        echo "  - cf-docs (npx mcp-remote with OAuth)"
    else
        echo "Warning: MCP template not found at $MCP_TEMPLATE"
    fi
else
    echo "MCP configuration already exists, preserving user settings"
fi

# Copy settings.json template if it doesn't exist
if [ ! -f "$CLAUDE_HOME/settings.json" ]; then
    if [ -f "$SETTINGS_TEMPLATE" ]; then
        echo "Copying Claude Code settings from template..."
        cp "$SETTINGS_TEMPLATE" "$CLAUDE_HOME/settings.json"
        chown node:node "$CLAUDE_HOME/settings.json"
        echo "✓ Environment variables configured (MAX_MCP_OUTPUT_TOKENS, timeouts)"
    fi
else
    echo "Settings already exist, preserving user settings"
fi

# Ensure npm global directory structure exists (required for npx with MCP servers)
if [ ! -d "/home/node/.npm-global/lib" ]; then
    echo "Creating npm global directory structure..."
    mkdir -p /home/node/.npm-global/lib
    chown -R node:node /home/node/.npm-global
    echo "✓ npm global directory initialized"
fi

echo "Claude Code configuration complete"
2. Create settings.json.template
This template configures Claude Code with optimized settings:
Basic Configuration (Recommended)
{
  "$schema": "https://json.schemastore.org/claude-code-settings.json",
  "dangerously_skip_permissions": true,
  "verbose": true,
  "env": {
    "MAX_MCP_OUTPUT_TOKENS": "60000",
    "BASH_DEFAULT_TIMEOUT_MS": "300000",
    "BASH_MAX_TIMEOUT_MS": "600000",
    "MAX_THINKING_TOKENS": "8192"
  },
  "includeCoAuthoredBy": false
}
📝 Note: MCP servers are now configured
separately in
.mcp.json
at the project root (see section 3 below).
Optional: With OpenTelemetry
Use this version if you have OpenTelemetry infrastructure (otel-collector service):
{
  "$schema": "https://json.schemastore.org/claude-code-settings.json",
  "dangerously_skip_permissions": true,
  "verbose": true,
  "env": {
    "MAX_MCP_OUTPUT_TOKENS": "60000",
    "BASH_DEFAULT_TIMEOUT_MS": "300000",
    "BASH_MAX_TIMEOUT_MS": "600000",
    "MAX_THINKING_TOKENS": "8192",
    "CLAUDE_CODE_ENABLE_TELEMETRY": "1",
    "OTEL_LOG_USER_PROMPTS": "1",
    "OTEL_METRICS_EXPORTER": "otlp",
    "OTEL_LOGS_EXPORTER": "otlp",
    "OTEL_EXPORTER_OTLP_PROTOCOL": "grpc",
    "OTEL_EXPORTER_OTLP_ENDPOINT": "http://otel-collector:4317",
    "OTEL_RESOURCE_ATTRIBUTES": "deployment.environment=devcontainer,service.name=claude-code"
  },
  "includeCoAuthoredBy": false
}
📝 Note: MCP servers are now configured
separately in
.mcp.json
at the project root (see section 3 below).
🔧 Key Settings Explained:
- MAX_MCP_OUTPUT_TOKENS: Allows larger documentation responses (60,000 tokens)
- BASH_*_TIMEOUT_MS: Extended timeouts for long-running commands
- MAX_THINKING_TOKENS: Enables deeper reasoning (8,192 tokens)
- dangerously_skip_permissions: Skips tool execution prompts for 50-80% faster responses (⚠️ ONLY safe in isolated devcontainers)
- verbose: Enables detailed logging for easier debugging (no performance impact)
📊 Optional OpenTelemetry Variables:
Only include these if you have OpenTelemetry infrastructure (otel-collector service):
- CLAUDE_CODE_ENABLE_TELEMETRY: Enables telemetry collection in Claude Code
- OTEL_LOG_USER_PROMPTS: Logs user prompts for debugging and analysis
- OTEL_METRICS_EXPORTER: Sets metrics export protocol (otlp)
- OTEL_LOGS_EXPORTER: Sets logs export protocol (otlp)
- OTEL_EXPORTER_OTLP_PROTOCOL: Communication protocol for OTLP (grpc or http)
- OTEL_EXPORTER_OTLP_ENDPOINT: URL of your OpenTelemetry collector endpoint
- OTEL_RESOURCE_ATTRIBUTES: Service identification metadata for distributed tracing
3. Create mcp.json.template
MCP configuration with stdio transport using npx for package execution:
{
  "mcpServers": {
    "context7": {
      "command": "npx",
      "args": ["-y", "@upstash/context7-mcp"],
      "env": {
        "CONTEXT7_API_KEY": "${CONTEXT7_API_KEY}"
      }
    },
    "cf-docs": {
      "command": "npx",
      "args": ["mcp-remote", "https://docs.mcp.cloudflare.com/mcp"]
    },
    "chrome-devtools": {
      "command": "npx",
      "args": [
        "-y",
        "chrome-devtools-mcp@latest",
        "--executablePath=/usr/bin/chromium",
        "--headless",
        "--chromeArg=--no-sandbox",
        "--chromeArg=--disable-setuid-sandbox",
        "--chromeArg=--disable-dev-shm-usage"
      ],
      "transport": {
        "type": "stdio"
      }
    }
  }
}
💡 Chrome DevTools Note: The
--executablePath=/usr/bin/chromium
argument is required in containers because Chromium (not
Google Chrome) is installed at
/usr/bin/chromium. The
--no-sandbox
and related flags are required for running Chromium in
Docker containers.
4. Create config.toml.template (Codex CLI)
This template configures Codex CLI for Docker containers by disabling the Landlock sandbox (not supported in LinuxKit kernel):
# Codex CLI configuration template for Docker containers
# Auto-copied to ~/.codex/config.toml by init-codex-config.sh

model = "gpt-5"
model_reasoning_effort = "medium"

# CRITICAL: Disable Landlock sandbox (not supported in Docker's LinuxKit kernel)
# OpenAI's official recommendation for containerized environments
# Security is provided by Docker isolation, network firewall, and non-root user
sandbox_mode = "danger-full-access"
approval_policy = "never"


[tui]
# Desktop notifications from the TUI: boolean or filtered list. Default: false
# Examples: true | ["agent-turn-complete", "approval-requested"]
notifications = false
# Show raw reasoning content when available (default: false)
show_raw_agent_reasoning = true
# Ensure we do not hide internal reasoning (default: false)
hide_agent_reasoning = false

[features]
web_search_request = true
unified_exec = false
streamable_shell = false
rmcp_client = false
apply_patch_freeform = false
view_image_tool = true
experimental_sandbox_command_assessment = false
ghost_commit = false
enable_experimental_windows_sandbox = false

[mcp_servers.cf-docs]
command = "npx"
args = ["-y", "mcp-remote", "https://docs.mcp.cloudflare.com/sse"]

[mcp_servers.chrome-devtools]
command = "npx"
args = [
"-y",
"chrome-devtools-mcp@latest",
"--executablePath=/usr/bin/chromium",
"--headless",
"--isolated",
"--chromeArg=--no-sandbox",
"--chromeArg=--disable-setuid-sandbox",
"--chromeArg=--disable-dev-shm-usage"
]

[mcp_servers.context7]
command = "npx"
args = ["-y", "@upstash/context7-mcp@latest"]
🔒 Why Disable Sandbox?
- Docker's LinuxKit kernel doesn't support Landlock security module
- Container already provides isolation via Docker, firewall, non-root user
- OpenAI's official recommendation for containerized environments
- See Troubleshooting → Codex CLI Landlock Error for details
5. Create init-codex-config.sh
This script automatically configures Codex CLI on container startup:
#!/bin/bash
set -euo pipefail

CODEX_HOME="/home/node/.codex"
CONFIG_FILE="$CODEX_HOME/config.toml"
CONFIG_TEMPLATE="/usr/local/share/codex-defaults/config.toml"

echo "Initializing Codex CLI configuration..."

# Create .codex directory if it doesn't exist
if [ ! -d "$CODEX_HOME" ]; then
    echo "Creating $CODEX_HOME directory..."
    mkdir -p "$CODEX_HOME"
    chown node:node "$CODEX_HOME"
fi

# Copy config template if it doesn't exist
if [ ! -f "$CONFIG_FILE" ]; then
    if [ -f "$CONFIG_TEMPLATE" ]; then
        echo "Copying Codex CLI configuration from template..."
        cp "$CONFIG_TEMPLATE" "$CONFIG_FILE"
        chown node:node "$CONFIG_FILE"
        echo "✓ Codex sandbox disabled (Docker container isolation used instead)"
        echo "  sandbox_mode: danger-full-access"
        echo "  approval_policy: never"
    else
        echo "Warning: Codex config template not found at $CONFIG_TEMPLATE"
    fi
else
    echo "Codex config already exists, preserving user settings"
fi

echo "Codex CLI configuration complete"
💡 Key Features:
- Idempotent: Only creates config if it doesn't exist
- Preserves user settings: Won't overwrite existing configuration
- Proper ownership: Uses chown to ensure node user can access files
- Informative output: Logs what it's doing for debugging
6. Integrate into Dockerfile
Add these sections to your Dockerfile to enable automatic configuration:
# Switch to root for setup
USER root

# Create directories for Claude Code and Codex defaults
RUN mkdir -p /usr/local/share/claude-defaults /usr/local/share/codex-defaults

# Copy init scripts and templates
COPY init-claude-config.sh /usr/local/bin/
COPY init-codex-config.sh /usr/local/bin/
COPY --chown=node:node settings.json.template /usr/local/share/claude-defaults/settings.json
COPY --chown=node:node mcp.json.template /usr/local/share/claude-defaults/mcp.json
COPY --chown=node:node config.toml.template /usr/local/share/codex-defaults/config.toml

# Set permissions and configure sudoers for all init scripts
RUN chmod +x /usr/local/bin/init-claude-config.sh && \
    chmod +x /usr/local/bin/init-codex-config.sh && \
    echo "node ALL=(root) NOPASSWD: /usr/local/bin/init-claude-config.sh" > /etc/sudoers.d/node-claude-config && \
    echo "node ALL=(root) NOPASSWD: /usr/local/bin/init-codex-config.sh" > /etc/sudoers.d/node-codex-config && \
    chmod 0440 /etc/sudoers.d/node-claude-config && \
    chmod 0440 /etc/sudoers.d/node-codex-config

# Switch back to node user
USER node
7. Update devcontainer.json
Run all initialization scripts on container startup:
{
  "postStartCommand": "sudo /usr/local/bin/init-claude-config.sh && sudo /usr/local/bin/init-codex-config.sh && sudo /usr/local/bin/init-firewall.sh"
}
📝 Init Script Order:
- init-claude-config.sh - Configure Claude Code & MCP servers
- init-codex-config.sh - Configure Codex CLI (disable Landlock sandbox)
- init-firewall.sh - Apply network security rules (runs last)
Config scripts run before the firewall to ensure npm/npx can download packages if needed. All scripts run automatically each time the container starts.
✅ Benefits:
- Zero manual setup: MCP servers configured automatically on first run
- Instant documentation access: Ask Claude about any library and get current docs
- Preserves customization: Won't overwrite if you modify settings manually
- Team consistency: Everyone gets the same optimized configuration
- Extensible: Easy to add more MCP servers or environment variables
🪝 Session Start Hook Configuration
Session hooks allow you to run automated checks and setup tasks when Claude Code starts. This project includes a SessionStart hook that verifies your devcontainer environment on every session.
💡 What the Session Hook Does:
- Confirms devcontainer environment detection
- Verifies mounted volumes (.claude, .codex, .gemini, .opencode, etc.)
- Lists configured MCP servers
- Checks tool availability (claude, codex, gemini, opencode, gh, etc.)
- Displays network configuration
- Shows current git branch and warns if on main/master
Configuration Format
Add this to your ~/.claude/settings.json (user-level)
or .claude/settings.json (workspace-level):
{
  "$schema": "https://json.schemastore.org/claude-code-settings.json",
  "hooks": {
    "SessionStart": [
      {
        "hooks": [
          {
            "type": "command",
            "command": "\"$CLAUDE_PROJECT_DIR\"/.claude/hooks/session-start.sh"
          }
        ]
      }
    ]
  }
}
✅ Correct Format - Key Points:
-
Capitalized event name: Use
"SessionStart", not"sessionStart" -
Array format:
"SessionStart": [{ "hooks": [...] }] - No matcher field: SessionStart hooks don't use matchers (unlike PreToolUse/PostToolUse)
- $CLAUDE_PROJECT_DIR variable: Use instead of absolute paths for portability
- Double quotes around path: Required for paths with environment variables
⚠️ Common Mistakes to Avoid:
❌ Old format (will fail validation):
{
  "hooks": {
    "sessionStart": {
      "command": ".claude/hooks/session-start.sh"
    }
  }
}
❌ With matcher field (SessionStart doesn't use matchers):
{
  "hooks": {
    "SessionStart": [{
      "matcher": {},
      "hooks": [...]
    }]
  }
}
Hook Deployment
The session hook is deployed automatically when the devcontainer is first created, using a 4-step process:
BUILD - Template Inclusion
Dockerfile copies
session-start.sh.template and
init-claude-hooks.sh into the container image at
build time.
CREATE - Deployment Script Execution
postCreateCommand runs
init-claude-hooks.sh on first container creation.
DEPLOY - Template Copy to Workspace
Script copies template to
.claude/hooks/session-start.sh (only if file
doesn't exist, preserving user customizations).
PERSIST - Volume Survival
.claude/ directory is mounted as a Docker volume,
so your customizations survive container rebuilds.
init-claude-hooks.sh deployment script:
#!/bin/bash
# Claude Code hook deployment script
set -e

echo "=== Claude Code Hooks Setup ==="

TEMPLATE_DIR="/usr/local/share/claude-defaults/hooks"
WORKSPACE_HOOKS="/workspaces/$(basename $PWD)/.claude/hooks"

mkdir -p "$WORKSPACE_HOOKS"

# Only deploy if hook doesn't exist (preserves user customizations)
if [ ! -f "$WORKSPACE_HOOKS/session-start.sh" ]; then
    cp "$TEMPLATE_DIR/session-start.sh" "$WORKSPACE_HOOKS/session-start.sh"
    chmod +x "$WORKSPACE_HOOKS/session-start.sh"
    echo "✅ Deployed session-start.sh"
else
    echo "ℹ️  session-start.sh already exists (skipping)"
fi

echo "=== Hooks Setup Complete ==="
💡 Key Benefits:
- Automatic deployment: No manual copying required
- Preserves customizations: Won't overwrite existing hooks
- Survives rebuilds: Volume persistence keeps your changes
- Template versioning: Template stays in container for reference
Verifying the Hook
To verify your hook configuration is correct:
# Check for validation errors
claude /doctor

# Should show no errors in "Invalid Settings" section
# If you see errors about hooks format, the configuration is incorrect
📚 Additional Resources:
- • Official hooks documentation: docs.claude.com/hooks
- • Hook examples: Claude Cookbooks
-
• Session hook script: Located at
.devcontainer/session-start.sh.template
🚀 Launching Your Dev Container
Now that you understand dev containers and have configured your setup, here's how to launch and use them:
First Time Setup
Slower (5-10 min)Dev Containers: Open Folder in Container
Subsequent Launches
Fast (<30 sec)Dev Containers: Reopen in Container
💡 Tip: VS Code will automatically prompt you
with "Reopen in Container" when you open a folder containing a
.devcontainer
directory.
⚛️ React Project Setup
Let's create a dev container for a React project. Follow these steps:
Create the .devcontainer directory
mkdir -p .devcontainer
cd .devcontainerCreate devcontainer.json
This file configures VS Code's connection to the container:
{
  "name": "React Dev Container",
  "build": {
    "dockerfile": "Dockerfile"
  },
  "customizations": {
    "vscode": {
      "extensions": [
        "anthropic.claude-code",
        "dbaeumer.vscode-eslint",
        "esbenp.prettier-vscode",
        "bradlc.vscode-tailwindcss"
      ],
      "settings": {
        "editor.formatOnSave": true,
        "editor.defaultFormatter": "esbenp.prettier-vscode"
      }
    }
  },
  "runArgs": [
    "--cap-drop=ALL",
    "--cap-add=NET_ADMIN",
    "--cap-add=NET_RAW",
    "--cap-add=SETUID",
    "--cap-add=SETGID",
    "--cap-add=SYS_ADMIN",
    "--sysctl=net.ipv6.conf.all.disable_ipv6=1",
    "--sysctl=net.ipv6.conf.default.disable_ipv6=1",
    "--sysctl=net.ipv6.conf.lo.disable_ipv6=1"
  ],
  "forwardPorts": [3000, 5173],
  "postCreateCommand": "npm install -g @anthropic-ai/claude-code@latest && npm install -g @openai/codex && npm install -g @google/gemini-cli && npm install -g wrangler@latest && npm install -g vercel@latest && npm install && /usr/local/bin/init-claude-hooks.sh",
  "postStartCommand": "sudo /usr/local/bin/init-claude-config.sh && sudo /usr/local/bin/init-firewall.sh",
  "remoteUser": "node",
  "mounts": [
    "source=claude-code-bashhistory-${devcontainerId},target=/commandhistory,type=volume",
    "source=claude-config-${devcontainerId},target=/home/node/.claude,type=volume",
    "source=codex-config-${devcontainerId},target=/home/node/.codex,type=volume",
    "source=gemini-config-${devcontainerId},target=/home/node/.gemini,type=volume",
    "source=opencode-config-${devcontainerId},target=/home/node/.opencode,type=volume",
    "source=ghub-config-${devcontainerId},target=/home/node/.config/gh,type=volume",
    "source=npm-global-${devcontainerId},target=/home/node/.npm-global,type=volume",
    "source=cargo-${devcontainerId},target=/home/node/.cargo,type=volume",
    "source=bun-${devcontainerId},target=/home/node/.bun,type=volume",
    "source=local-bin-${devcontainerId},target=/home/node/.local,type=volume",
    "source=aws-config-${devcontainerId},target=/home/node/.aws,type=volume",
    "source=wrangler-config-${devcontainerId},target=/home/node/.wrangler,type=volume",
    "source=vercel-config-${devcontainerId},target=/home/node/.vercel,type=volume"
  ]
}
💡 What's happening here:
- extensions: Auto-installs Claude Code, ESLint, Prettier, and Tailwind CSS support
- runArgs: Grants minimal Docker capabilities for iptables firewall management (see Security & Firewall Setup)
- forwardPorts: Makes ports 3000 and 5173 accessible on your host machine
-
postCreateCommand: Runs
npm installautomatically after container creation - postStartCommand: Configures network firewall on container startup
- mounts: Persists command history, AI configs (Claude/Codex/Gemini), GitHub CLI auth, and npm global packages between rebuilds
🔧 Customize for Your Tools
Need other tools persisted? Add your own volumes using the same pattern:
"source=<tool>-${devcontainerId},target=/home/node/.<config-path>,type=volume"
Common tools for React projects:
- • Docker CLI:
~/.docker - • Yarn cache:
~/.yarn -
• VS Code extensions:
~/.vscode-server/extensions -
• Playwright browsers:
~/.cache/ms-playwright
Create Dockerfile
This defines what gets installed in your container:
# Start from Node.js 22 base image
FROM node:22

# Install essential tools and firewall dependencies
RUN apt-get update && apt-get install -y \
    git \
    curl \
    iptables \
    ipset \
    dnsutils \
    aggregate \
    jq \
    sudo \
    && rm -rf /var/lib/apt/lists/*

# npm CLI packages (Claude Code, OpenCode, Codex, Gemini, Wrangler, Vercel) installed via postCreateCommand
# This ensures packages install AFTER npm-global volume mounts, preventing version conflicts
# See devcontainer.json postCreateCommand for installation details

# Create directory for Claude Code defaults
RUN mkdir -p /usr/local/share/claude-defaults

# Copy initialization scripts and templates
COPY init-firewall.sh /usr/local/bin/
COPY init-claude-config.sh /usr/local/bin/
COPY --chown=node:node settings.json.template /usr/local/share/claude-defaults/settings.json
COPY --chown=node:node mcp.json.template /usr/local/share/claude-defaults/mcp.json

# Set permissions and configure sudoers for both scripts
RUN chmod +x /usr/local/bin/init-firewall.sh && \
    chmod +x /usr/local/bin/init-claude-config.sh && \
    echo "node ALL=(root) NOPASSWD: /usr/local/bin/init-firewall.sh" > /etc/sudoers.d/node-firewall && \
    echo "node ALL=(root) NOPASSWD: /usr/local/bin/init-claude-config.sh" > /etc/sudoers.d/node-claude-config && \
    chmod 0440 /etc/sudoers.d/node-firewall && \
    chmod 0440 /etc/sudoers.d/node-claude-config

# Set working directory
WORKDIR /workspace

# Configure git (optional, for better commit messages)
RUN git config --global init.defaultBranch main

# Switch to non-root user for security
USER node
✅ What each line does:
- FROM node:22: Uses official Node.js 22 as the base
- RUN apt-get: Installs Git, curl, and firewall tools (iptables, ipset, dnsutils, aggregate, jq, sudo)
- npm install -g: Installs Claude Code globally in the container
- COPY init-firewall.sh: Installs the firewall configuration script (see Security & Firewall Setup)
- sudoers configuration: Allows node user to run firewall script without password
- USER node: Runs as non-root user for better security
📝 Note: init-firewall.sh Script
Create the init-firewall.sh script in your
.devcontainer/ directory. The complete script
with all allowed domains is provided in the
Security & Firewall Setup
section above.
Open in VS Code
Now open your project in VS Code. You'll see a prompt:
"Folder contains a Dev Container configuration file. Reopen folder to develop in a container?"
Click "Reopen in Container". VS Code will:
- Build the Docker image (takes 5-10 minutes first time)
- Start the container
- Install VS Code extensions
- Run
npm install - Connect VS Code to the running container
⏱️ First Build: The first time takes longer (5-10 minutes) because Docker downloads the base image and installs everything. Subsequent starts are much faster (~30 seconds).
Test Your Setup
Once connected, open the integrated terminal and verify:
# Check Node.js version
node --version  # Should show v20.x.x

# Check npm version
npm --version

# Check Claude Code is installed
claude --version

# Start your React dev server
npm run dev  # or npm start
🎉 Your React app should now be running at
http://localhost:3000
or
http://localhost:5173
(Vite)!
🐍 Basic Python Project Setup
Let's create a simple dev container for a Python project with Flask or FastAPI. This basic setup is perfect for learning, simple scripts, and lightweight projects.
📌 Basic vs Advanced:
This basic setup uses standard pip and minimal dependencies. For production projects with advanced tooling (uv package manager, bun for hybrid apps, extended libraries), see the Advanced Python Setup below.
Create devcontainer.json for Python
{
  "name": "Python Dev Container",
  "build": {
    "dockerfile": "Dockerfile"
  },
  "customizations": {
    "vscode": {
      "extensions": [
        "anthropic.claude-code",
        "ms-python.python",
        "ms-python.vscode-pylance",
        "ms-python.debugpy",
        "ms-python.black-formatter",
        "charliermarsh.ruff"
      ],
      "settings": {
        "python.defaultInterpreterPath": "/usr/local/bin/python",
        "python.linting.enabled": true,
        "python.formatting.provider": "black",
        "editor.formatOnSave": true
      }
    }
  },
  "runArgs": [
    "--cap-drop=ALL",
    "--cap-add=NET_ADMIN",
    "--cap-add=NET_RAW",
    "--cap-add=SETUID",
    "--cap-add=SETGID",
    "--cap-add=SYS_ADMIN",
    "--sysctl=net.ipv6.conf.all.disable_ipv6=1",
    "--sysctl=net.ipv6.conf.default.disable_ipv6=1",
    "--sysctl=net.ipv6.conf.lo.disable_ipv6=1"
  ],
  "forwardPorts": [5000, 8000],
  "postCreateCommand": "pip install -r requirements.txt && /usr/local/bin/init-claude-config.sh && /usr/local/bin/init-python.sh && /usr/local/bin/init-claude-hooks.sh",
  "postStartCommand": "sudo /usr/local/bin/init-firewall.sh",
  "remoteUser": "node",
  "mounts": [
    "source=claude-code-bashhistory-${devcontainerId},target=/commandhistory,type=volume",
    "source=claude-config-${devcontainerId},target=/home/node/.claude,type=volume",
    "source=codex-config-${devcontainerId},target=/home/node/.codex,type=volume",
    "source=gemini-config-${devcontainerId},target=/home/node/.gemini,type=volume",
    "source=opencode-config-${devcontainerId},target=/home/node/.opencode,type=volume",
    "source=ghub-config-${devcontainerId},target=/home/node/.config/gh,type=volume",
    "source=local-bin-${devcontainerId},target=/home/node/.local,type=volume"
  ]
}
🔧 Customize for Your Tools
Python developers often need to persist additional tools. Add volumes using this pattern:
"source=<tool>-${devcontainerId},target=/home/vscode/.<config-path>,type=volume"
Common Python tools:
- • pip cache:
~/.cache/pip - • Poetry:
~/.config/pypoetry - • Jupyter:
~/.jupyter - • PostgreSQL CLI:
~/.psqlrc
Note: Adjust target paths for your user
(vscode vs node)
Create Dockerfile for Python
# Start from Node.js 22 base (modern approach with Python 3.14 via uv)
FROM mcr.microsoft.com/devcontainers/javascript-node:22-bookworm

# Install system dependencies and firewall tools
RUN apt-get update && apt-get install -y \
    git \
    curl \
    build-essential \
    iptables \
    ipset \
    dnsutils \
    aggregate \
    jq \
    sudo \
    python3.11 \
    python3.11-dev \
    python3-pip \
    && rm -rf /var/lib/apt/lists/*

# Install uv (fast Python package manager)
# uv installer places binary at /home/node/.local/bin/uv
USER node
RUN curl -LsSf https://astral.sh/uv/install.sh | sh && \
    echo 'export PATH="$HOME/.local/bin:$PATH"' >> /home/node/.bashrc
ENV PATH="/home/node/.local/bin:$PATH"

# Switch back to root for system configuration
USER root

# Install Claude Code CLI
RUN curl -fsSL https://claude.ai/install.sh | bash

# Create directory for Claude Code defaults
RUN mkdir -p /usr/local/share/claude-defaults

# Copy initialization scripts and templates
COPY init-firewall.sh /usr/local/bin/
COPY init-claude-config.sh /usr/local/bin/
COPY init-python.sh /usr/local/bin/
COPY --chown=node:node settings.json.template /usr/local/share/claude-defaults/settings.json
COPY --chown=node:node mcp.json.template /usr/local/share/claude-defaults/mcp.json

# Set permissions and configure sudoers for scripts
RUN chmod +x /usr/local/bin/init-firewall.sh && \
    chmod +x /usr/local/bin/init-claude-config.sh && \
    chmod +x /usr/local/bin/init-python.sh && \
    echo "node ALL=(root) NOPASSWD: /usr/local/bin/init-firewall.sh" > /etc/sudoers.d/node-firewall && \
    echo "node ALL=(root) NOPASSWD: /usr/local/bin/init-claude-config.sh" > /etc/sudoers.d/node-claude-config && \
    echo "node ALL=(root) NOPASSWD: /usr/local/bin/init-python.sh" > /etc/sudoers.d/node-python && \
    chmod 0440 /etc/sudoers.d/node-firewall && \
    chmod 0440 /etc/sudoers.d/node-claude-config && \
    chmod 0440 /etc/sudoers.d/node-python

# Set working directory
WORKDIR /workspaces

# Switch to non-root user
USER node

# Set Python to unbuffered mode (better for logs)
ENV PYTHONUNBUFFERED=1

# NOTE: Python 3.14 is installed via init-python.sh in postCreateCommand
# This ensures installation persists in /home/node/.local volume
🔍 Key differences from React setup:
- Node.js 22 base image: Modern approach combining Node.js and Python 3.14 via uv
- Python 3.11 system package: Installed for node-gyp compatibility
- uv package manager: Fast Python package manager for Python 3.14 installation
- build-essential: Needed for packages that compile C extensions
- init-python.sh: Installs Python 3.14 during postCreateCommand
- PYTHONUNBUFFERED=1: Makes print() output appear immediately in logs
Create requirements.txt
List your Python dependencies (example for Flask):
flask==3.0.0
python-dotenv==1.0.0
requests==2.31.0
Or for FastAPI:
fastapi==0.104.0
uvicorn[standard]==0.24.0
python-dotenv==1.0.0
pydantic==2.5.0Test Your Python Setup
After reopening in container, test in the terminal:
# Check Python version
python --version  # Should show Python 3.14.x

# Check pip version
pip --version

# Verify dependencies installed
pip list

# Run Flask app (example)
python app.py

# Or run FastAPI app (example)
uvicorn main:app --reload --host 0.0.0.0 --port 8000
🎉 Your Python app should now be accessible at
http://localhost:5000
(Flask) or
http://localhost:8000
(FastAPI)!
⚡ Advanced Python Project Setup
A production-ready Python dev container with modern tooling, extended libraries, and hybrid app support (Python + JavaScript frontends).
⚡ What's Included:
- uv: Fast Python package manager (10-100x faster than pip) + version management
- bun: JavaScript runtime for hybrid Python/JS projects (React, Vue, Svelte frontends)
- Extended libraries: Development libraries for data science, web scraping, and native extensions
- Modern tools: ripgrep, fd-find, jq, yq for faster development
Create devcontainer.json
{
  "name": "Advanced Python Dev Container",
  "build": {
    "dockerfile": "Dockerfile"
  },
  "customizations": {
    "vscode": {
      "extensions": [
        "anthropic.claude-code",
        "ms-python.python",
        "ms-python.vscode-pylance",
        "ms-python.debugpy",
        "ms-python.black-formatter",
        "charliermarsh.ruff"
      ],
      "settings": {
        "python.defaultInterpreterPath": "/usr/local/bin/python",
        "python.linting.enabled": true,
        "python.formatting.provider": "black",
        "editor.formatOnSave": true
      }
    }
  },
  "runArgs": [
    "--cap-drop=ALL",
    "--cap-add=NET_ADMIN",
    "--cap-add=NET_RAW",
    "--cap-add=SETUID",
    "--cap-add=SETGID",
    "--cap-add=SYS_ADMIN",
    "--sysctl=net.ipv6.conf.all.disable_ipv6=1",
    "--sysctl=net.ipv6.conf.default.disable_ipv6=1",
    "--sysctl=net.ipv6.conf.lo.disable_ipv6=1"
  ],
  "forwardPorts": [5000, 8000, 8888],
  "postCreateCommand": "uv pip install -r requirements.txt && /usr/local/bin/init-claude-config.sh && /usr/local/bin/init-python.sh && /usr/local/bin/init-claude-hooks.sh",
  "postStartCommand": "sudo /usr/local/bin/init-firewall.sh",
  "remoteUser": "node",
  "mounts": [
    "source=claude-code-bashhistory-${devcontainerId},target=/commandhistory,type=volume",
    "source=claude-config-${devcontainerId},target=/home/node/.claude,type=volume",
    "source=codex-config-${devcontainerId},target=/home/node/.codex,type=volume",
    "source=gemini-config-${devcontainerId},target=/home/node/.gemini,type=volume",
    "source=opencode-config-${devcontainerId},target=/home/node/.opencode,type=volume",
    "source=ghub-config-${devcontainerId},target=/home/node/.config/gh,type=volume",
    "source=cargo-${devcontainerId},target=/home/node/.cargo,type=volume",
    "source=bun-${devcontainerId},target=/home/node/.bun,type=volume",
    "source=local-bin-${devcontainerId},target=/home/node/.local,type=volume"
  ]
}
💡 What's different:
- Port 8888: Added for Jupyter Lab/Notebook
- uv pip install: Uses uv for 10-100x faster package installation
- cargo volume: Persists uv installation and Python versions
- bun volume: Persists bun installation for hybrid projects
🔧 Customize for Your Tools
This advanced setup already includes cargo (for uv/Rust tools) and bun. Add more volumes as needed:
"source=<tool>-${devcontainerId},target=/home/vscode/.<config-path>,type=volume"
Additional tools for advanced Python:
- • PostgreSQL CLI:
~/.psqlrc - • Redis CLI:
~/.redisclirc - • Docker:
~/.docker - • Kubernetes:
~/.kube
Create Dockerfile (Advanced)
# Start from Node.js 22 base (modern approach with Python 3.14 via uv)
FROM mcr.microsoft.com/devcontainers/javascript-node:22-bookworm

# Install extended system dependencies (organized by category)
RUN apt-get update && apt-get install -y \
    # Version control
    git \
    git-lfs \
    # Core utilities
    curl \
    wget \
    ca-certificates \
    # Build tools for native extensions
    build-essential \
    gcc \
    g++ \
    make \
    cmake \
    pkg-config \
    # Development libraries (for data science, web scraping, crypto)
    libffi-dev \
    libssl-dev \
    libz-dev \
    libbz2-dev \
    libreadline-dev \
    libsqlite3-dev \
    libncurses5-dev \
    libncursesw5-dev \
    liblzma-dev \
    # Text processing and data tools
    jq \
    yq \
    sed \
    gawk \
    # Modern search tools (faster alternatives)
    ripgrep \
    fd-find \
    # System utilities
    htop \
    tree \
    procps \
    # Network tools
    net-tools \
    iputils-ping \
    dnsutils \
    # Firewall tools
    iptables \
    ipset \
    aggregate \
    sudo \
    # Text editors
    vim \
    nano \
    # Locales for proper encoding
    locales \
    # Python 3.11 (system Python for node-gyp compatibility)
    python3.11 \
    python3.11-dev \
    python3-pip \
    && rm -rf /var/lib/apt/lists/*

# Set up locale (prevents encoding issues)
RUN sed -i -e 's/# en_US.UTF-8 UTF-8/en_US.UTF-8 UTF-8/' /etc/locale.gen && \
    locale-gen
ENV LANG=en_US.UTF-8 \
    LANGUAGE=en_US:en \
    LC_ALL=en_US.UTF-8

# NOTE: Using 'node' user from base image (no need to create vscode user)

# Install Claude Code CLI
RUN curl -fsSL https://claude.ai/install.sh | bash

# Create directory for Claude Code defaults
RUN mkdir -p /usr/local/share/claude-defaults

# Copy initialization scripts and templates
COPY init-firewall.sh /usr/local/bin/
COPY init-claude-config.sh /usr/local/bin/
COPY init-python.sh /usr/local/bin/
COPY --chown=node:node settings.json.template /usr/local/share/claude-defaults/settings.json
COPY --chown=node:node mcp.json.template /usr/local/share/claude-defaults/mcp.json

# Set permissions and configure sudoers for scripts
RUN chmod +x /usr/local/bin/init-firewall.sh && \
    chmod +x /usr/local/bin/init-claude-config.sh && \
    chmod +x /usr/local/bin/init-python.sh && \
    echo "node ALL=(root) NOPASSWD: /usr/local/bin/init-firewall.sh" > /etc/sudoers.d/node-firewall && \
    echo "node ALL=(root) NOPASSWD: /usr/local/bin/init-claude-config.sh" > /etc/sudoers.d/node-claude-config && \
    echo "node ALL=(root) NOPASSWD: /usr/local/bin/init-python.sh" > /etc/sudoers.d/node-python && \
    chmod 0440 /etc/sudoers.d/node-firewall && \
    chmod 0440 /etc/sudoers.d/node-claude-config && \
    chmod 0440 /etc/sudoers.d/node-python

# Set working directory
WORKDIR /workspaces

# Install Python dev tools globally
RUN pip install --no-cache-dir \
    black \
    pylint \
    pytest \
    ipython \
    jupyter \
    jupyterlab

# Switch to non-root user
USER node

# Install uv (fast Python package manager + version management)
# uv installer places binary at /home/node/.local/bin/uv
RUN curl -LsSf https://astral.sh/uv/install.sh | sh && \
    echo 'export PATH="$HOME/.local/bin:$PATH"' >> /home/node/.bashrc
ENV PATH="/home/node/.local/bin:$PATH"

# Install bun (for Python projects with JS/TS frontends)
RUN curl -fsSL https://bun.sh/install | bash && \
    echo 'export BUN_INSTALL="$HOME/.bun"' >> /home/node/.bashrc && \
    echo 'export PATH="$BUN_INSTALL/bin:$PATH"' >> /home/node/.bashrc
ENV BUN_INSTALL="/home/node/.bun"
ENV PATH="$BUN_INSTALL/bin:$PATH"

# Set Python to unbuffered mode (better for logs)
ENV PYTHONUNBUFFERED=1

# NOTE: Python 3.14 is installed via init-python.sh in postCreateCommand
# This ensures installation persists in /home/node/.local volume
🔍 Key additions:
- Extended libraries: Support SQLite, compression (lzma), SSL, foreign function interface
- Modern tools: ripgrep (rg) and fd-find for faster code/file search than grep/find
- uv: Installed as non-root user, 10-100x faster than pip
- bun: For hybrid Python/JavaScript projects (Django + React, Flask + Vue, etc.)
- Jupyter/JupyterLab: For data science and interactive development
Install Dependencies
You can use either traditional pip OR modern uv. Both work with the same requirements.txt:
Using traditional pip:
pip install -r requirements.txt
pip list
Using uv (10-100x faster):
uv pip install -r requirements.txt
uv pip list
⚡ Why uv is faster:
- Written in Rust (compiled language vs Python)
- Parallel package downloads and installations
- Better dependency resolution algorithm
- Drop-in replacement for pip - same commands, faster execution
Verify Installation
Test all installed tools:
# Verify Python
python --version  # Should show Python 3.14.x

# Verify pip
pip --version

# Verify uv
uv --version

# Verify bun (for hybrid projects)
bun --version

# Verify modern tools
rg --version    # ripgrep (fast search)
fdfind --version # fd (fast find)
jq --version    # JSON processor

# Test your Flask/FastAPI app
python app.py
# or
uvicorn main:app --reload --host 0.0.0.0 --port 8000
🎉 Your advanced Python environment is ready for production development!
🔄 Changing Python Versions
Need to switch to Python 3.13, 3.14, or 3.15? Here are two methods:
Method 1: Change Docker Base Image (Simplest)
Edit the first line of your Dockerfile to use a different Python version:
# Python 3.14 (current default - managed via uv + init-python.sh)
FROM mcr.microsoft.com/devcontainers/javascript-node:22-bookworm
# NOTE: Python 3.14 installed in postCreateCommand via init-python.sh
# System Python 3.11 included for node-gyp compatibility

# Python 3.13 (alternative via Docker base image)
FROM python:3.13-slim

# Python 3.11 only (for legacy compatibility)
FROM python:3.11-slim
After changing, rebuild the container:
Cmd/Ctrl+Shift+P
→ "Dev Containers: Rebuild Container"
Method 2: Use uv for Version Management (Most Flexible)
With uv, you can install and switch between multiple Python versions WITHOUT rebuilding the container:
# List available Python versions
uv python list

# Install Python 3.13
uv python install 3.13

# Install Python 3.14
uv python install 3.14

# Install Python 3.15 (if available)
uv python install 3.15

# Create virtual environment with specific Python version
uv venv --python 3.13

# Install packages with specific Python version
uv pip install --python 3.13 -r requirements.txt

# Pin Python version for the project
uv python pin 3.13
✅ Benefits of uv for version management:
- Switch Python versions instantly (no container rebuild)
- Test code across multiple Python versions
- Faster than pyenv or manual Python compilation
- Integrated with uv's package management
📝 Version Selection Guide:
- Python 3.14: Current default in this devcontainer (via uv), latest features, managed by init-python.sh script
- Python 3.11: System Python (included for node-gyp compatibility), LTS version, excellent library compatibility
- Python 3.13: Alternative stable release, good balance of features and compatibility
- Python 3.15+: Experimental/preview, testing only, not for production
🐍 Python 3.14 Setup Script (init-python.sh)
This project uses a dedicated script to install Python 3.14
via uv during postCreateCommand. The script ensures
reproducible Python setup and persists installation in the
/home/node/.local
volume:
#!/bin/bash
set -e

echo "=== Python 3.14 Setup ==="

# Install Python 3.14 via uv
echo "Installing Python 3.14..."
/home/node/.local/bin/uv python install 3.14

# Pin Python 3.14 for the project
echo "Pinning Python 3.14..."
cd /workspaces/claude-devcontainer
/home/node/.local/bin/uv python pin 3.14

# Get Python 3.14 path
PYTHON314_PATH=$(/home/node/.local/bin/uv python find 3.14)
echo "Python 3.14 installed at: $PYTHON314_PATH"

# Create system symlink and update alternatives (requires sudo)
sudo ln -sf "$PYTHON314_PATH" /usr/local/bin/python3.14
sudo update-alternatives --install /usr/bin/python python /usr/local/bin/python3.14 100
sudo update-alternatives --install /usr/bin/python3 python3 /usr/local/bin/python3.14 100

# Verify installation
echo "Verifying Python installation..."
python --version
python3 --version
echo ""
echo "Available Python versions:"
/home/node/.local/bin/uv python list

echo "✅ Python 3.14 configured as default"
✅ Why use init-python.sh?
- Runs during postCreateCommand: Executes after volume mounts, ensuring proper persistence
-
Volume persistence: Python 3.14
installation saved in
/home/node/.localvolume - System Python 3.11 retained: Keeps Python 3.11 for node-gyp compatibility
- Reproducible setup: Same Python version across container rebuilds
-
update-alternatives integration: Sets
Python 3.14 as default
pythoncommand
📌 Project Python Version Pinning (.python-version)
This project uses a
.python-version
file to pin the Python version for the project:
3.14This file tells uv which Python version to use for the project. To switch versions:
# Change to Python 3.13
echo "3.13" > .python-version
uv python pin 3.13

# Install the new version if not already installed
uv python install 3.13
⚡ Next.js Project Setup
Let's create a dev container for a Next.js application with all the modern tooling:
Create .devcontainer directory
In your Next.js project root, create the directory and files:
mkdir -p .devcontainer
cd .devcontainer
touch devcontainer.json DockerfileCreate devcontainer.json
Add this configuration optimized for Next.js development:
{
  "name": "Next.js Dev Container",
  "build": {
    "dockerfile": "Dockerfile"
  },
  "customizations": {
    "vscode": {
      "extensions": [
        "anthropic.claude-code",
        "dbaeumer.vscode-eslint",
        "esbenp.prettier-vscode",
        "bradlc.vscode-tailwindcss"
      ],
      "settings": {
        "editor.formatOnSave": true,
        "editor.defaultFormatter": "esbenp.prettier-vscode",
        "typescript.preferences.importModuleSpecifier": "relative"
      }
    }
  },
  "runArgs": [
    "--cap-drop=ALL",
    "--cap-add=NET_ADMIN",
    "--cap-add=NET_RAW",
    "--cap-add=SETUID",
    "--cap-add=SETGID",
    "--cap-add=SYS_ADMIN",
    "--sysctl=net.ipv6.conf.all.disable_ipv6=1",
    "--sysctl=net.ipv6.conf.default.disable_ipv6=1",
    "--sysctl=net.ipv6.conf.lo.disable_ipv6=1"
  ],
  "forwardPorts": [3000],
  "postCreateCommand": "npm install -g @anthropic-ai/claude-code@latest && npm install -g @openai/codex && npm install -g @google/gemini-cli && npm install && /usr/local/bin/init-claude-hooks.sh",
  "postStartCommand": "sudo /usr/local/bin/init-claude-config.sh && sudo /usr/local/bin/init-firewall.sh",
  "remoteUser": "node",
  "mounts": [
    "source=claude-code-bashhistory-${devcontainerId},target=/commandhistory,type=volume",
    "source=claude-config-${devcontainerId},target=/home/node/.claude,type=volume",
    "source=codex-config-${devcontainerId},target=/home/node/.codex,type=volume",
    "source=gemini-config-${devcontainerId},target=/home/node/.gemini,type=volume",
    "source=opencode-config-${devcontainerId},target=/home/node/.opencode,type=volume",
    "source=ghub-config-${devcontainerId},target=/home/node/.config/gh,type=volume",
    "source=npm-global-${devcontainerId},target=/home/node/.npm-global,type=volume",
    "source=cargo-${devcontainerId},target=/home/node/.cargo,type=volume",
    "source=bun-${devcontainerId},target=/home/node/.bun,type=volume",
    "source=local-bin-${devcontainerId},target=/home/node/.local,type=volume",
    "source=aws-config-${devcontainerId},target=/home/node/.aws,type=volume",
    "source=wrangler-config-${devcontainerId},target=/home/node/.wrangler,type=volume",
    "source=vercel-config-${devcontainerId},target=/home/node/.vercel,type=volume"
  ]
}
💡 What's happening here:
- Port 3000: Next.js default development server port
- npm-global volume: Persists globally installed CLI tools (npm install -g) across rebuilds
- Tailwind CSS extension: IntelliSense for Tailwind classes in your JSX/TSX files
- TypeScript settings: Optimized for Next.js import conventions
🔧 Customize for Your Stack
Next.js projects often need additional tool persistence:
"source=<tool>-${devcontainerId},target=/home/node/.<config-path>,type=volume"
Popular Next.js tools:
-
• Playwright browsers:
~/.cache/ms-playwright - • Turborepo cache:
~/.turbo - • Vercel CLI:
~/.vercel - • Docker CLI:
~/.docker
Add volumes for your deployment and testing tools
Create Dockerfile
Use Node.js 22 LTS for optimal Next.js performance:
FROM node:22

# npm CLI packages (Claude Code, Codex, Gemini) installed via postCreateCommand
# This ensures packages install AFTER npm-global volume mounts, preventing version conflicts
# See devcontainer.json postCreateCommand for installation details

# Install common development tools and firewall dependencies
RUN apt-get update && apt-get install -y \
    git \
    curl \
    vim \
    iptables \
    ipset \
    dnsutils \
    aggregate \
    jq \
    sudo \
    && rm -rf /var/lib/apt/lists/*

# Create directory for Claude Code defaults
RUN mkdir -p /usr/local/share/claude-defaults

# Copy initialization scripts and templates
COPY init-firewall.sh /usr/local/bin/
COPY init-claude-config.sh /usr/local/bin/
COPY --chown=node:node settings.json.template /usr/local/share/claude-defaults/settings.json
COPY --chown=node:node mcp.json.template /usr/local/share/claude-defaults/mcp.json

# Set permissions and configure sudoers for both scripts
RUN chmod +x /usr/local/bin/init-firewall.sh && \
    chmod +x /usr/local/bin/init-claude-config.sh && \
    echo "node ALL=(root) NOPASSWD: /usr/local/bin/init-firewall.sh" > /etc/sudoers.d/node-firewall && \
    echo "node ALL=(root) NOPASSWD: /usr/local/bin/init-claude-config.sh" > /etc/sudoers.d/node-claude-config && \
    chmod 0440 /etc/sudoers.d/node-firewall && \
    chmod 0440 /etc/sudoers.d/node-claude-config

# Set working directory
WORKDIR /workspace

# Keep container running
CMD ["sleep", "infinity"]
⚠️ Note:
Next.js 13+ requires Node.js 16.14 or later. We're using Node 22 LTS for the best performance and latest features.
Open in VS Code
Same as before - VS Code will detect the dev container configuration:
- Open the project folder in VS Code
- Click "Reopen in Container" when prompted (or use Command Palette → "Dev Containers: Reopen in Container")
- Wait for the container to build (first time takes a few minutes)
Test your setup
Once connected, verify everything is working:
# Check Node.js version
node --version  # Should show v20.x.x

# Check npm version
npm --version

# Check Claude Code is installed
claude --version

# Start Next.js development server
npm run dev
🎉 Your Next.js app should now be running at
http://localhost:3000!
✅ Pro Tips:
- The npm cache volume persists between container rebuilds, making installs much faster
- Hot reload works perfectly - just save your files and see changes instantly
- Use Claude Code to help scaffold new pages, components, and API routes
🤖 Multiple AI Assistants Setup
Want to use Claude Code, OpenAI Codex, Google Gemini, AND OpenCode in the same dev container? Here's how to set up all four AI assistants:
🎯 Why Multiple AI Assistants?
- Claude Code: Excellent for complex reasoning, refactoring, and architectural decisions
- Codex: Great for code completion and quick code generation
- Gemini: Strong at multimodal tasks and Google ecosystem integration
- OpenCode: Open-source, terminal-native agent with multi-model support and privacy-first design
- Use the right tool for each specific task!
Create devcontainer.json
Configure all three AI extensions with separate volume mounts:
{
  "name": "Multi-AI Dev Container",
  "build": {
    "dockerfile": "Dockerfile"
  },
  "customizations": {
    "vscode": {
      "extensions": [
        "anthropic.claude-code",
        "openai.codex-vscode",
        "sst-dev.opencode",
        "google.gemini-cli-vscode-ide-companion",
        "google.geminicodeassist",
        "dbaeumer.vscode-eslint",
        "esbenp.prettier-vscode",
        "kilocode.kilo-code",
        "tamasfe.even-better-toml",
        "ms-toolsai.jupyter-keymap",
        "ms-vscode.sublime-keybindings",
        "grapecity.gc-excelviewer",
        "imgildev.vscode-json-flow",
        "redhat.vscode-yaml"
      ],
      "settings": {
        "editor.formatOnSave": true
      }
    }
  },
  "runArgs": [
    "--cap-drop=ALL",
    "--cap-add=NET_ADMIN",
    "--cap-add=NET_RAW",
    "--cap-add=SETUID",
    "--cap-add=SETGID",
    "--cap-add=SYS_ADMIN",
    "--sysctl=net.ipv6.conf.all.disable_ipv6=1",
    "--sysctl=net.ipv6.conf.default.disable_ipv6=1",
    "--sysctl=net.ipv6.conf.lo.disable_ipv6=1"
  ],
  "forwardPorts": [3000, 5000, 8000],
  "postCreateCommand": "npm install -g @anthropic-ai/claude-code@latest && npm install -g @openai/codex && npm install -g @google/gemini-cli && npm install -g opencode-ai@latest && npm install -g wrangler@latest && npm install -g vercel@latest && (npm install || pip install -r requirements.txt || echo 'No dependencies to install') && /usr/local/bin/init-claude-config.sh && /usr/local/bin/init-codex-config.sh && /usr/local/bin/init-opencode-config.sh && /usr/local/bin/init-python.sh && /usr/local/bin/init-claude-hooks.sh",
  "postStartCommand": "sudo /usr/local/bin/init-firewall.sh",
  "remoteUser": "node",
  "mounts": [
    "source=claude-code-bashhistory-${devcontainerId},target=/commandhistory,type=volume",
    "source=claude-config-${devcontainerId},target=/home/node/.claude,type=volume",
    "source=codex-config-${devcontainerId},target=/home/node/.codex,type=volume",
    "source=gemini-config-${devcontainerId},target=/home/node/.gemini,type=volume",
    "source=opencode-config-${devcontainerId},target=/home/node/.opencode,type=volume",
    "source=ghub-config-${devcontainerId},target=/home/node/.config/gh,type=volume",
    "source=npm-global-${devcontainerId},target=/home/node/.npm-global,type=volume",
    "source=cargo-${devcontainerId},target=/home/node/.cargo,type=volume",
    "source=bun-${devcontainerId},target=/home/node/.bun,type=volume",
    "source=local-bin-${devcontainerId},target=/home/node/.local,type=volume",
    "source=aws-config-${devcontainerId},target=/home/node/.aws,type=volume",
    "source=wrangler-config-${devcontainerId},target=/home/node/.wrangler,type=volume",
    "source=vercel-config-${devcontainerId},target=/home/node/.vercel,type=volume"
  ]
}
💡 What's happening here:
- Complete volume setup: All 13 volumes for full production capabilities - command history, AI configs (.claude, .codex, .gemini, .opencode), GitHub CLI, npm global, local bin, cargo (Rust/uv), bun, AWS, wrangler, vercel
- Multiple extensions: Install all AI assistant VS Code extensions at once
- Multiple ports: Forward common ports for different project types
- Flexible postCreateCommand: Works with npm, pip, or no dependencies
🔧 Customize for Your Infrastructure
This is the FULL production setup. Add infrastructure and deployment tools:
"source=<tool>-${devcontainerId},target=/home/node/.<config-path>,type=volume"
Common infrastructure tools:
- • Docker:
~/.docker - • Kubernetes:
~/.kube - • Terraform:
~/.terraform.d - • AWS CLI:
~/.aws - • Google Cloud:
~/.config/gcloud - • Azure CLI:
~/.azure
Pro tip: Use volumes for ANY tool config you want persistent between rebuilds
Create Dockerfile
Install all three CLI tools globally:
FROM node:22

ARG TZ
ENV TZ="$TZ"

ARG CLAUDE_CODE_VERSION=latest

# Upgrade npm to latest version (ensures security patches and latest features)
RUN npm install -g npm@latest

# Install development tools, compilers, and utilities with BuildKit cache mounts
# BuildKit cache mounts provide 5-10x faster rebuilds
RUN --mount=type=cache,target=/var/cache/apt,sharing=locked \
  --mount=type=cache,target=/var/lib/apt/lists,sharing=locked \
  apt-get update && apt-get install -y --no-install-recommends \
  # Core utilities
  less curl wget ca-certificates gnupg2 software-properties-common \
  apt-transport-https lsb-release \
  # Version control
  git git-lfs gh \
  # Shell and terminal tools
  zsh fzf man-db \
  # Process and system tools
  procps htop tree sudo \
  # Network tools
  dnsutils net-tools iputils-ping telnet netcat-openbsd \
  iptables ipset iproute2 aggregate \
  # Archive and compression
  unzip zip bzip2 xz-utils \
  # Text processing and data
  jq yq sed gawk \
  # Fast search tools (modern replacements)
  ripgrep fd-find \
  # Build essentials (for native npm modules)
  build-essential gcc g++ make cmake pkg-config \
  # Python (for node-gyp and AI CLIs)
  python3 python3-pip python3-venv python3-dev \
  # Text editors
  nano vim tmux \
  # OpenSSL and crypto
  openssl libssl-dev \
  # Additional development libraries
  libz-dev libffi-dev libbz2-dev libreadline-dev libsqlite3-dev \
  libncurses5-dev libncursesw5-dev liblzma-dev \
  # Locales for proper encoding
  locales \
  # Browser automation (Chromium for Chrome DevTools MCP)
  chromium fonts-liberation libatk-bridge2.0-0 libatk1.0-0 \
  libatspi2.0-0 libcups2 libdbus-1-3 libdrm2 libgbm1 libgtk-3-0 \
  libnspr4 libnss3 libxcomposite1 libxdamage1 libxfixes3 \
  libxkbcommon0 libxrandr2 xdg-utils \
  && apt-get clean && rm -rf /var/lib/apt/lists/*

# Set up locale (prevents encoding issues with AI CLIs)
RUN sed -i -e 's/# en_US.UTF-8 UTF-8/en_US.UTF-8 UTF-8/' /etc/locale.gen && \
  locale-gen
ENV LANG=en_US.UTF-8 \
  LANGUAGE=en_US:en \
  LC_ALL=en_US.UTF-8

# Ensure default node user has access to /usr/local/share
RUN chown -R node:node /usr/local/share

ARG USERNAME=node

# Persist bash history and configure PATH for npm global packages
RUN SNIPPET="export PROMPT_COMMAND='history -a' && export HISTFILE=/commandhistory/.bash_history" \
  && mkdir /commandhistory \
  && touch /commandhistory/.bash_history \
  && chown -R $USERNAME /commandhistory \
  && echo 'export PATH=$PATH:/home/node/.npm-global/bin:/home/node/.local/bin' >> /home/node/.bashrc \
  && chown node:node /home/node/.bashrc

# Set `DEVCONTAINER` environment variable to help with orientation
ENV DEVCONTAINER=true

# Create config directories and set permissions
RUN mkdir -p /home/node/.config/gh /home/node/.claude /home/node/.codex /home/node/.gemini /home/node/.npm-global/lib /home/node/.aws /home/node/.wrangler /home/node/.vercel /home/node/.local/bin && \
  chown -R node:node /home/node/.config/gh /home/node/.claude /home/node/.codex /home/node/.gemini /home/node/.npm-global /home/node/.aws /home/node/.wrangler /home/node/.vercel /home/node/.local

# Default working directory
WORKDIR /workspaces

# Install git-delta for better diffs
ARG GIT_DELTA_VERSION=0.18.2
RUN ARCH=$(dpkg --print-architecture) && \
  wget "https://github.com/dandavison/delta/releases/download/${GIT_DELTA_VERSION}/git-delta_${GIT_DELTA_VERSION}_${ARCH}.deb" && \
  dpkg -i "git-delta_${GIT_DELTA_VERSION}_${ARCH}.deb" && \
  rm "git-delta_${GIT_DELTA_VERSION}_${ARCH}.deb"

# Set up non-root user
USER node

# Install global packages
ENV NPM_CONFIG_PREFIX=/home/node/.npm-global
ENV PATH=$PATH:/home/node/.npm-global/bin

# Set the default shell to zsh rather than sh
ENV SHELL=/bin/zsh

# Set the default editor and visual
ENV EDITOR=nano
ENV VISUAL=nano

# Install zsh with powerline10k theme
ARG ZSH_IN_DOCKER_VERSION=1.2.0
RUN sh -c "$(wget -O- https://github.com/deluan/zsh-in-docker/releases/download/v${ZSH_IN_DOCKER_VERSION}/zsh-in-docker.sh)" -- \
  -p git \
  -p fzf \
  -a "source /usr/share/doc/fzf/examples/key-bindings.zsh" \
  -a "source /usr/share/doc/fzf/examples/completion.zsh" \
  -a "export PROMPT_COMMAND='history -a' && export HISTFILE=/commandhistory/.bash_history" \
  -a "export PATH=\$PATH:/home/node/.npm-global/bin:/home/node/.local/bin" \
  -a "alias fd=fdfind" \
  -a "alias rg='rg --smart-case'" \
  -x

# npm CLI packages (Claude Code, OpenCode, Codex, Gemini, Wrangler, Vercel) installed via postCreateCommand
# This ensures packages install AFTER npm-global volume mounts, preventing version conflicts
# See devcontainer.json postCreateCommand for installation details

# Install AWS CLI v2 to volume-persisted location
RUN curl "https://awscli.amazonaws.com/awscli-exe-linux-$(uname -m).zip" -o "awscliv2.zip" && \
    unzip awscliv2.zip && \
    ./aws/install --install-dir /home/node/.local/aws-cli --bin-dir /home/node/.local/bin && \
    rm -rf awscliv2.zip aws

# Add .local/bin to PATH for AWS CLI
ENV PATH="/home/node/.local/bin:$PATH"

# Install uv (fast Python package manager - 10-100x faster than pip)
# uv installer places binary at /home/node/.local/bin/uv
RUN curl -LsSf https://astral.sh/uv/install.sh | sh && \
    echo 'export PATH="$HOME/.local/bin:$PATH"' >> /home/node/.bashrc && \
    echo 'export PATH="$HOME/.local/bin:$PATH"' >> /home/node/.zshrc
# Note: .local/bin already in PATH via ENV declaration above

# Install bun (fast JavaScript runtime for hybrid Python/JS projects)
RUN curl -fsSL https://bun.sh/install | bash && \
    echo 'export BUN_INSTALL="$HOME/.bun"' >> /home/node/.bashrc && \
    echo 'export PATH="$BUN_INSTALL/bin:$PATH"' >> /home/node/.bashrc && \
    echo 'export BUN_INSTALL="$HOME/.bun"' >> /home/node/.zshrc && \
    echo 'export PATH="$BUN_INSTALL/bin:$PATH"' >> /home/node/.zshrc
ENV BUN_INSTALL="/home/node/.bun"
ENV PATH="$BUN_INSTALL/bin:$PATH"

# Configure git to ignore Claude's local settings (Anthropic best practice)
RUN git config --global core.excludesfile ~/.gitignore_global && \
  echo ".claude/settings.local.json" > /home/node/.gitignore_global && \
  chown node:node /home/node/.gitignore_global

# Switch to root for final setup (scripts, sudoers, templates)
USER root

# Create directories for Claude Code and Codex defaults
RUN mkdir -p /usr/local/share/claude-defaults /usr/local/share/codex-defaults

# Copy all scripts and templates
COPY init-firewall.sh /usr/local/bin/
COPY init-claude-config.sh /usr/local/bin/
COPY init-codex-config.sh /usr/local/bin/
COPY --chown=node:node settings.json.template /usr/local/share/claude-defaults/settings.json
COPY --chown=node:node mcp.json.template /usr/local/share/claude-defaults/mcp.json
COPY --chown=node:node config.toml.template /usr/local/share/codex-defaults/config.toml

# Set permissions and configure sudoers for all init scripts
RUN chmod +x /usr/local/bin/init-firewall.sh && \
  chmod +x /usr/local/bin/init-claude-config.sh && \
  chmod +x /usr/local/bin/init-codex-config.sh && \
  chmod +x /usr/local/bin/init-opencode-config.sh && \
  echo "node ALL=(root) NOPASSWD: /usr/local/bin/init-firewall.sh" > /etc/sudoers.d/node-firewall && \
  echo "node ALL=(root) NOPASSWD: /usr/local/bin/init-claude-config.sh" > /etc/sudoers.d/node-claude-config && \
  echo "node ALL=(root) NOPASSWD: /usr/local/bin/init-codex-config.sh" > /etc/sudoers.d/node-codex-config && \
  echo "node ALL=(root) NOPASSWD: /usr/local/bin/init-opencode-config.sh" > /etc/sudoers.d/node-opencode-config && \
  chmod 0440 /etc/sudoers.d/node-firewall && \
  chmod 0440 /etc/sudoers.d/node-claude-config && \
  chmod 0440 /etc/sudoers.d/node-codex-config && \
  chmod 0440 /etc/sudoers.d/node-opencode-config

# Switch back to node user for runtime
USER node
⚠️ Important Notes:
- You'll need valid API keys for each service to authenticate. For Claude Code and Codex CLI, you can also use your paid Claude AI Pro/Max or ChatGPT Plus/Pro accounts to authenticate
- Each AI assistant authenticates independently
- Build time will be longer with all three CLIs installed
- Consider your API usage costs across multiple services
Authentication Setup
After the container builds, authenticate each AI service:
# Authenticate Claude Code
# Claude /login slash command
/login

# Authenticate Codex
codex auth login

# Authenticate Gemini (3 options)

# Option 1: .env file (recommended for devcontainers)
cp .env.example .env
# Edit .env and add: GEMINI_API_KEY=your_key_here

# Option 2: Environment variable
export GEMINI_API_KEY=YOUR_GOOGLE_API_KEY

# Option 3: Settings file
mkdir -p ~/.gemini
echo '{"apiKey": "YOUR_GOOGLE_API_KEY"}' > ~/.gemini/settings.json
🔑 Getting API Keys:
- Claude/Anthropic: Visit console.anthropic.com
- OpenAI Codex: Visit platform.openai.com/api-keys
- Google Gemini: Visit makersuite.google.com/app/apikey
⚠️ Security: .env is git-ignored. Never commit API keys to version control.
Verify Installation
Test that all three AI assistants are properly installed and configured:
# Check Claude Code
claude --version

# Check Codex
codex --version

# Check Gemini
gemini --version

# Check Wrangler
wrangler --version

# Check gh
gh --version

# Check AWS CLI
aws --version

# Check Vercel CLIs
vercel --version
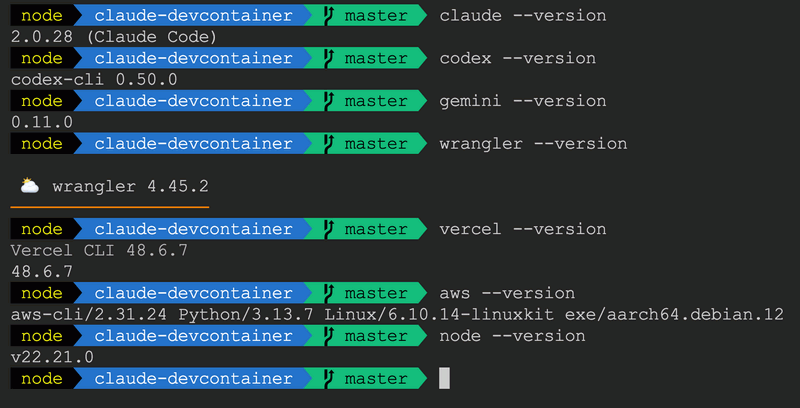
Example output showing all CLI tools successfully installed and configured within dev container
🎉 All three AI assistants should now be ready to use!
✅ Best Practices:
- Task-specific usage: Use Claude for complex reasoning, Codex for quick completions, Gemini for multimodal work
- API cost awareness: Monitor your usage across all three services to manage costs
- Config persistence: Volume mounts ensure you don't need to re-authenticate when rebuilding containers
- Security: Never commit API keys to your repository - keep them in the volume-mounted config directories
- Extension conflicts: If you experience conflicts, you can disable individual extensions in VS Code settings
🤖 AI CLI Authentication
Before using Claude Code, Codex CLI, or Gemini CLI within your dev container, you need to authenticate each tool with its respective API service. Authentication is a one-time setup that persists across container rebuilds thanks to Docker volume mounts.
💡 Why AI CLI Authentication Matters:
- Enables AI assistants to access their respective APIs for code generation and assistance
-
Credentials are stored in
~/.config/directories that persist via Docker volumes - One-time setup per container - authentication survives container rebuilds
- Each CLI uses different authentication methods (OAuth, API keys) suited to their service
1. Claude Code Authentication
Claude Code uses the /login slash command to
authenticate with your Anthropic account. This opens a
browser-based OAuth flow where you can choose between using your
Claude subscription (Pro, Max, Team, Enterprise) or Anthropic
Console account for API usage billing.
/login
Claude Code login screen: Select authentication method (Claude subscription or Console API billing)
✅ Authentication Persistence
Claude Code stores authentication tokens in
~/.config/claude/, which is mounted as a Docker
volume. Your login persists across container rebuilds,
eliminating the need to re-authenticate after
devcontainer.json changes.
🔧 Troubleshooting:
- If login fails, ensure Docker Desktop is forwarding ports correctly
- Browser may block popup - check for blocked popup notifications
- If already logged in elsewhere, you may need to sign out first
2. Codex CLI Authentication
Codex CLI uses OpenAI's authentication system via the
codex auth login command. This starts a local
server and opens your browser to authenticate with your OpenAI
account. The CLI supports standard OpenAI authentication flow.
codex auth login
Codex CLI authentication: Local server starts on localhost and opens OpenAI OAuth flow
✅ Authentication Persistence
Codex CLI stores OAuth tokens in
~/.config/codex/, mounted as a Docker volume.
After initial authentication, the CLI maintains session across
container rebuilds automatically.
🔧 Troubleshooting:
- Browser must be able to access localhost:1455 - check firewall settings
-
If authentication fails, try clearing
~/.config/codex/and re-authenticating -
Port forwarding may need to be configured in
devcontainer.jsonfor remote development
3. Gemini CLI Authentication
Gemini CLI offers multiple authentication options via the
/auth slash command. While OAuth with Google is
available, using an API key is the
recommended approach for dev container
environments as it provides more reliable authentication without
browser dependencies.
/auth
Gemini CLI authentication: Choose between Google OAuth, API Key (recommended), or Vertex AI
✅ Authentication Persistence
Gemini CLI stores API keys and OAuth tokens in
~/.config/gemini/, mounted as a Docker volume.
Configuration persists across container rebuilds.
API Key Recommendation: Select "Use Gemini API Key" option for most reliable container experience. Get your API key from Google AI Studio.
🔧 Troubleshooting:
- If OAuth login fails, switch to API key authentication method
- API keys can be created and managed at Google AI Studio
- Verify API key has necessary permissions for Gemini models
4. OpenCode Authentication
OpenCode is provider-agnostic and supports multiple AI providers. Configure your preferred provider using environment variables or the config command.
Option 1: Anthropic (Claude)
export ANTHROPIC_API_KEY=YOUR_ANTHROPIC_API_KEY
opencode config set provider anthropic
opencode config set apiKey YOUR_ANTHROPIC_API_KEY
Option 2: OpenAI
export OPENAI_API_KEY=YOUR_OPENAI_API_KEY
opencode config set provider openai
Option 3: Google (Gemini)
export GOOGLE_API_KEY=YOUR_GOOGLE_API_KEY
opencode config set provider google
Multi-Model Flexibility: OpenCode stores API
keys in ~/.opencode/config (persists via Docker
volume). You can switch providers anytime without
re-authentication using
opencode config set provider <name>.
Verify Configuration
opencode config list
opencode --version
🔒 Security Note:
-
All credentials persist in
/home/node/.config/directories mounted as Docker volumes - Volumes survive container rebuilds but are deleted if you remove the container completely
-
Never commit
.config/directories or API keys to git repositories -
Use
.gitignoreto exclude sensitive configuration files - For team environments, use environment variables or secret management tools
✨ Best Practices:
- Prefer API keys for Gemini: More reliable than OAuth in containerized environments
- Verify authentication after rebuilds: Quick test with each CLI ensures credentials persisted correctly
- Document required credentials: Update your project README with authentication requirements
-
Use named volumes: Explicitly name your
config volumes in
devcontainer.jsonfor easier management - Backup important configurations: Export API keys to secure password manager before major container changes
🔑 GitHub CLI Authentication
The GitHub CLI (gh) is pre-installed for creating
pull requests and managing repositories. One-time authentication
setup is required and persists across container rebuilds.
💡 Why GitHub CLI Matters:
- Create pull requests:
gh pr create - Required for git-pr-helper skill workflows
- Integrates with CLAUDE.md Git Safety Protocol
Quick Setup
gh auth loginFollow the prompts:
- Choose GitHub.com
- Select HTTPS protocol
- Authenticate Git credentials: Yes
- Choose "Login with a web browser"
- Copy the one-time code and press Enter
- Authorize in your browser
✅ One-Time Setup
Authentication is stored in
/home/node/.config/gh and backed by a Docker
volume. It persists across container rebuilds and only needs to
be done once per devcontainer volume.
Verify Setup
gh auth statusShould show: ✓ Logged in to github.com as your-username
📷 Examples: Multi-AI Collaboration
This example demonstrates the power of running multiple AI assistants (Claude Code, OpenAI Codex CLI, and Google Gemini CLI) within a single dev container. Using a custom AI cross-verifier skill, we can leverage each model's unique strengths for comprehensive code analysis and evaluation.
🤖 AI Cross Verifier Skill:
The AI Cross Verifier skill enables Claude to coordinate with OpenAI Codex and Google Gemini CLI to provide independent code reviews, plan validation, and comparative analysis for cross-verification of technical decisions.
💡 What This Demonstrates:
- Multi-AI orchestration: Claude coordinates with Codex and Gemini CLIs for cross-verification
- Unified environment: All three AI assistants working seamlessly in one container
- Custom skills: AI cross-verifier skill automates multi-model evaluation workflows
- Real-world task: Analyzing and summarizing the llms.txt documentation file
Scenario: llms.txt Summarization & Cross-Evaluation
In this workflow, we ask Claude Code to summarize the llms.txt file and evaluate responses from both Codex CLI and Gemini CLI. This showcases how the AI cross-verifier skill enables sophisticated multi-model comparisons with a single command.

Step 1: Initial request to Claude to summarize llms.txt and compare with other AI models
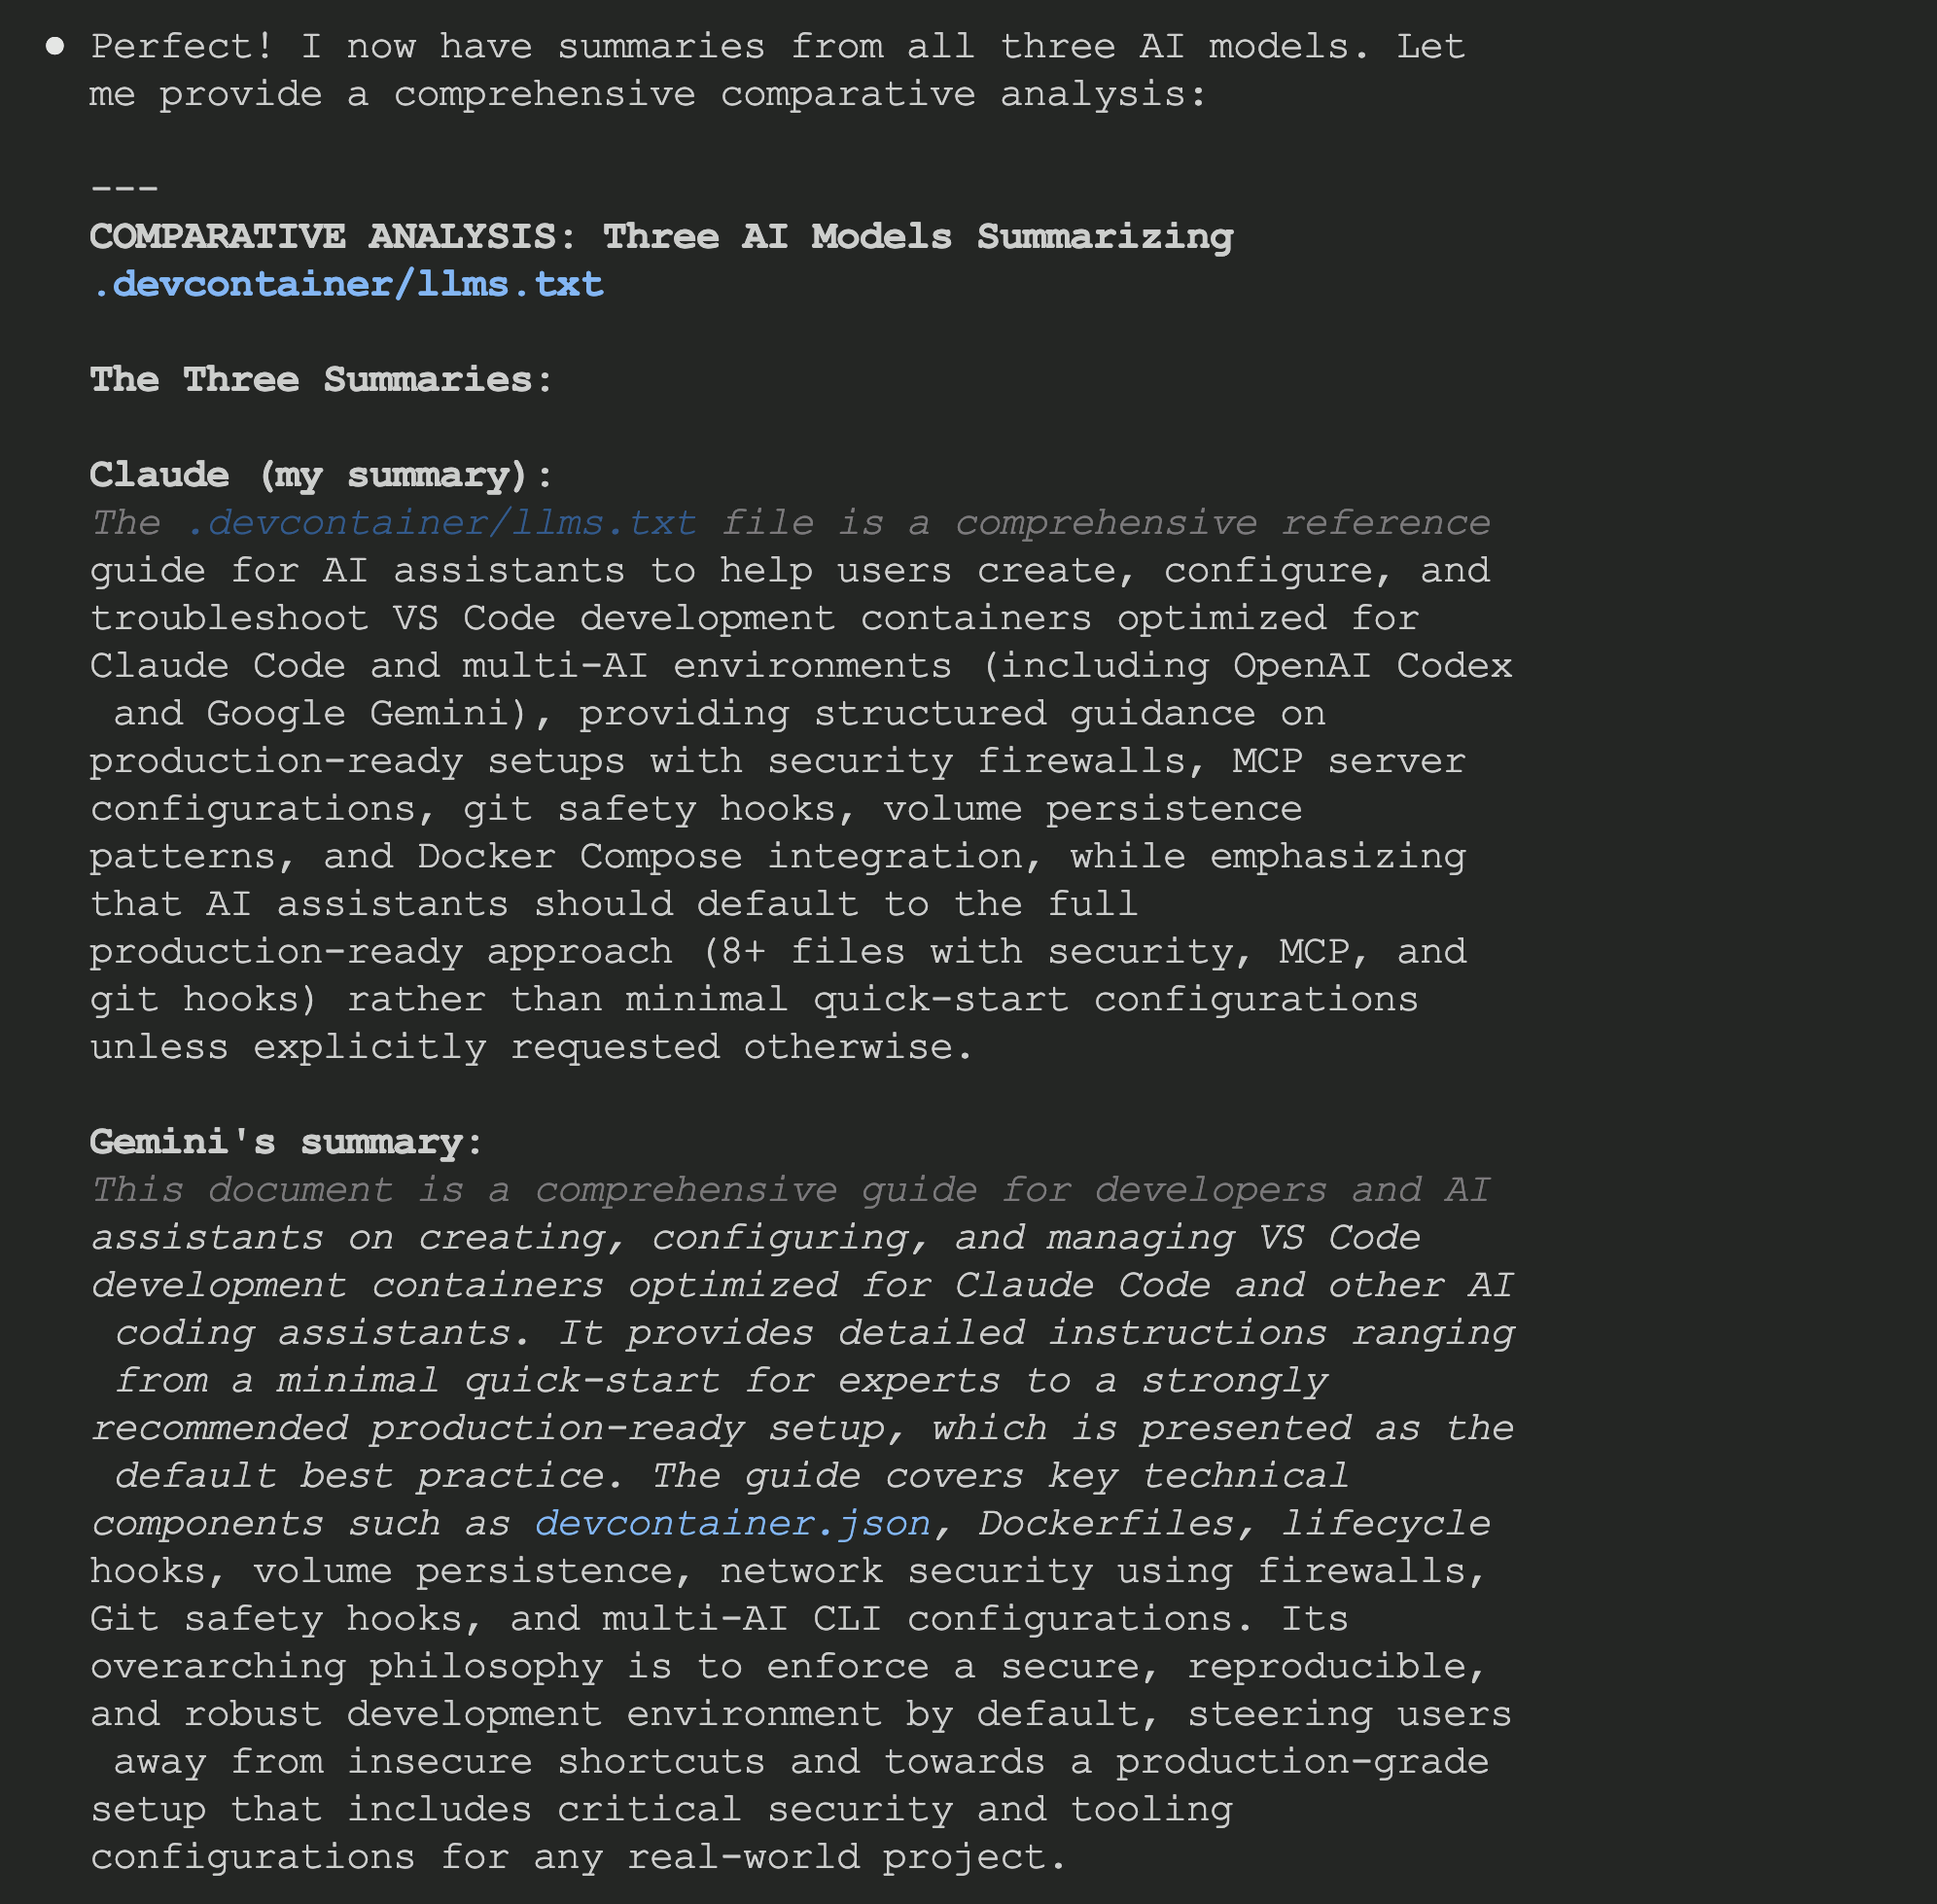
Step 2: Claude invokes Codex CLI to get OpenAI's analysis
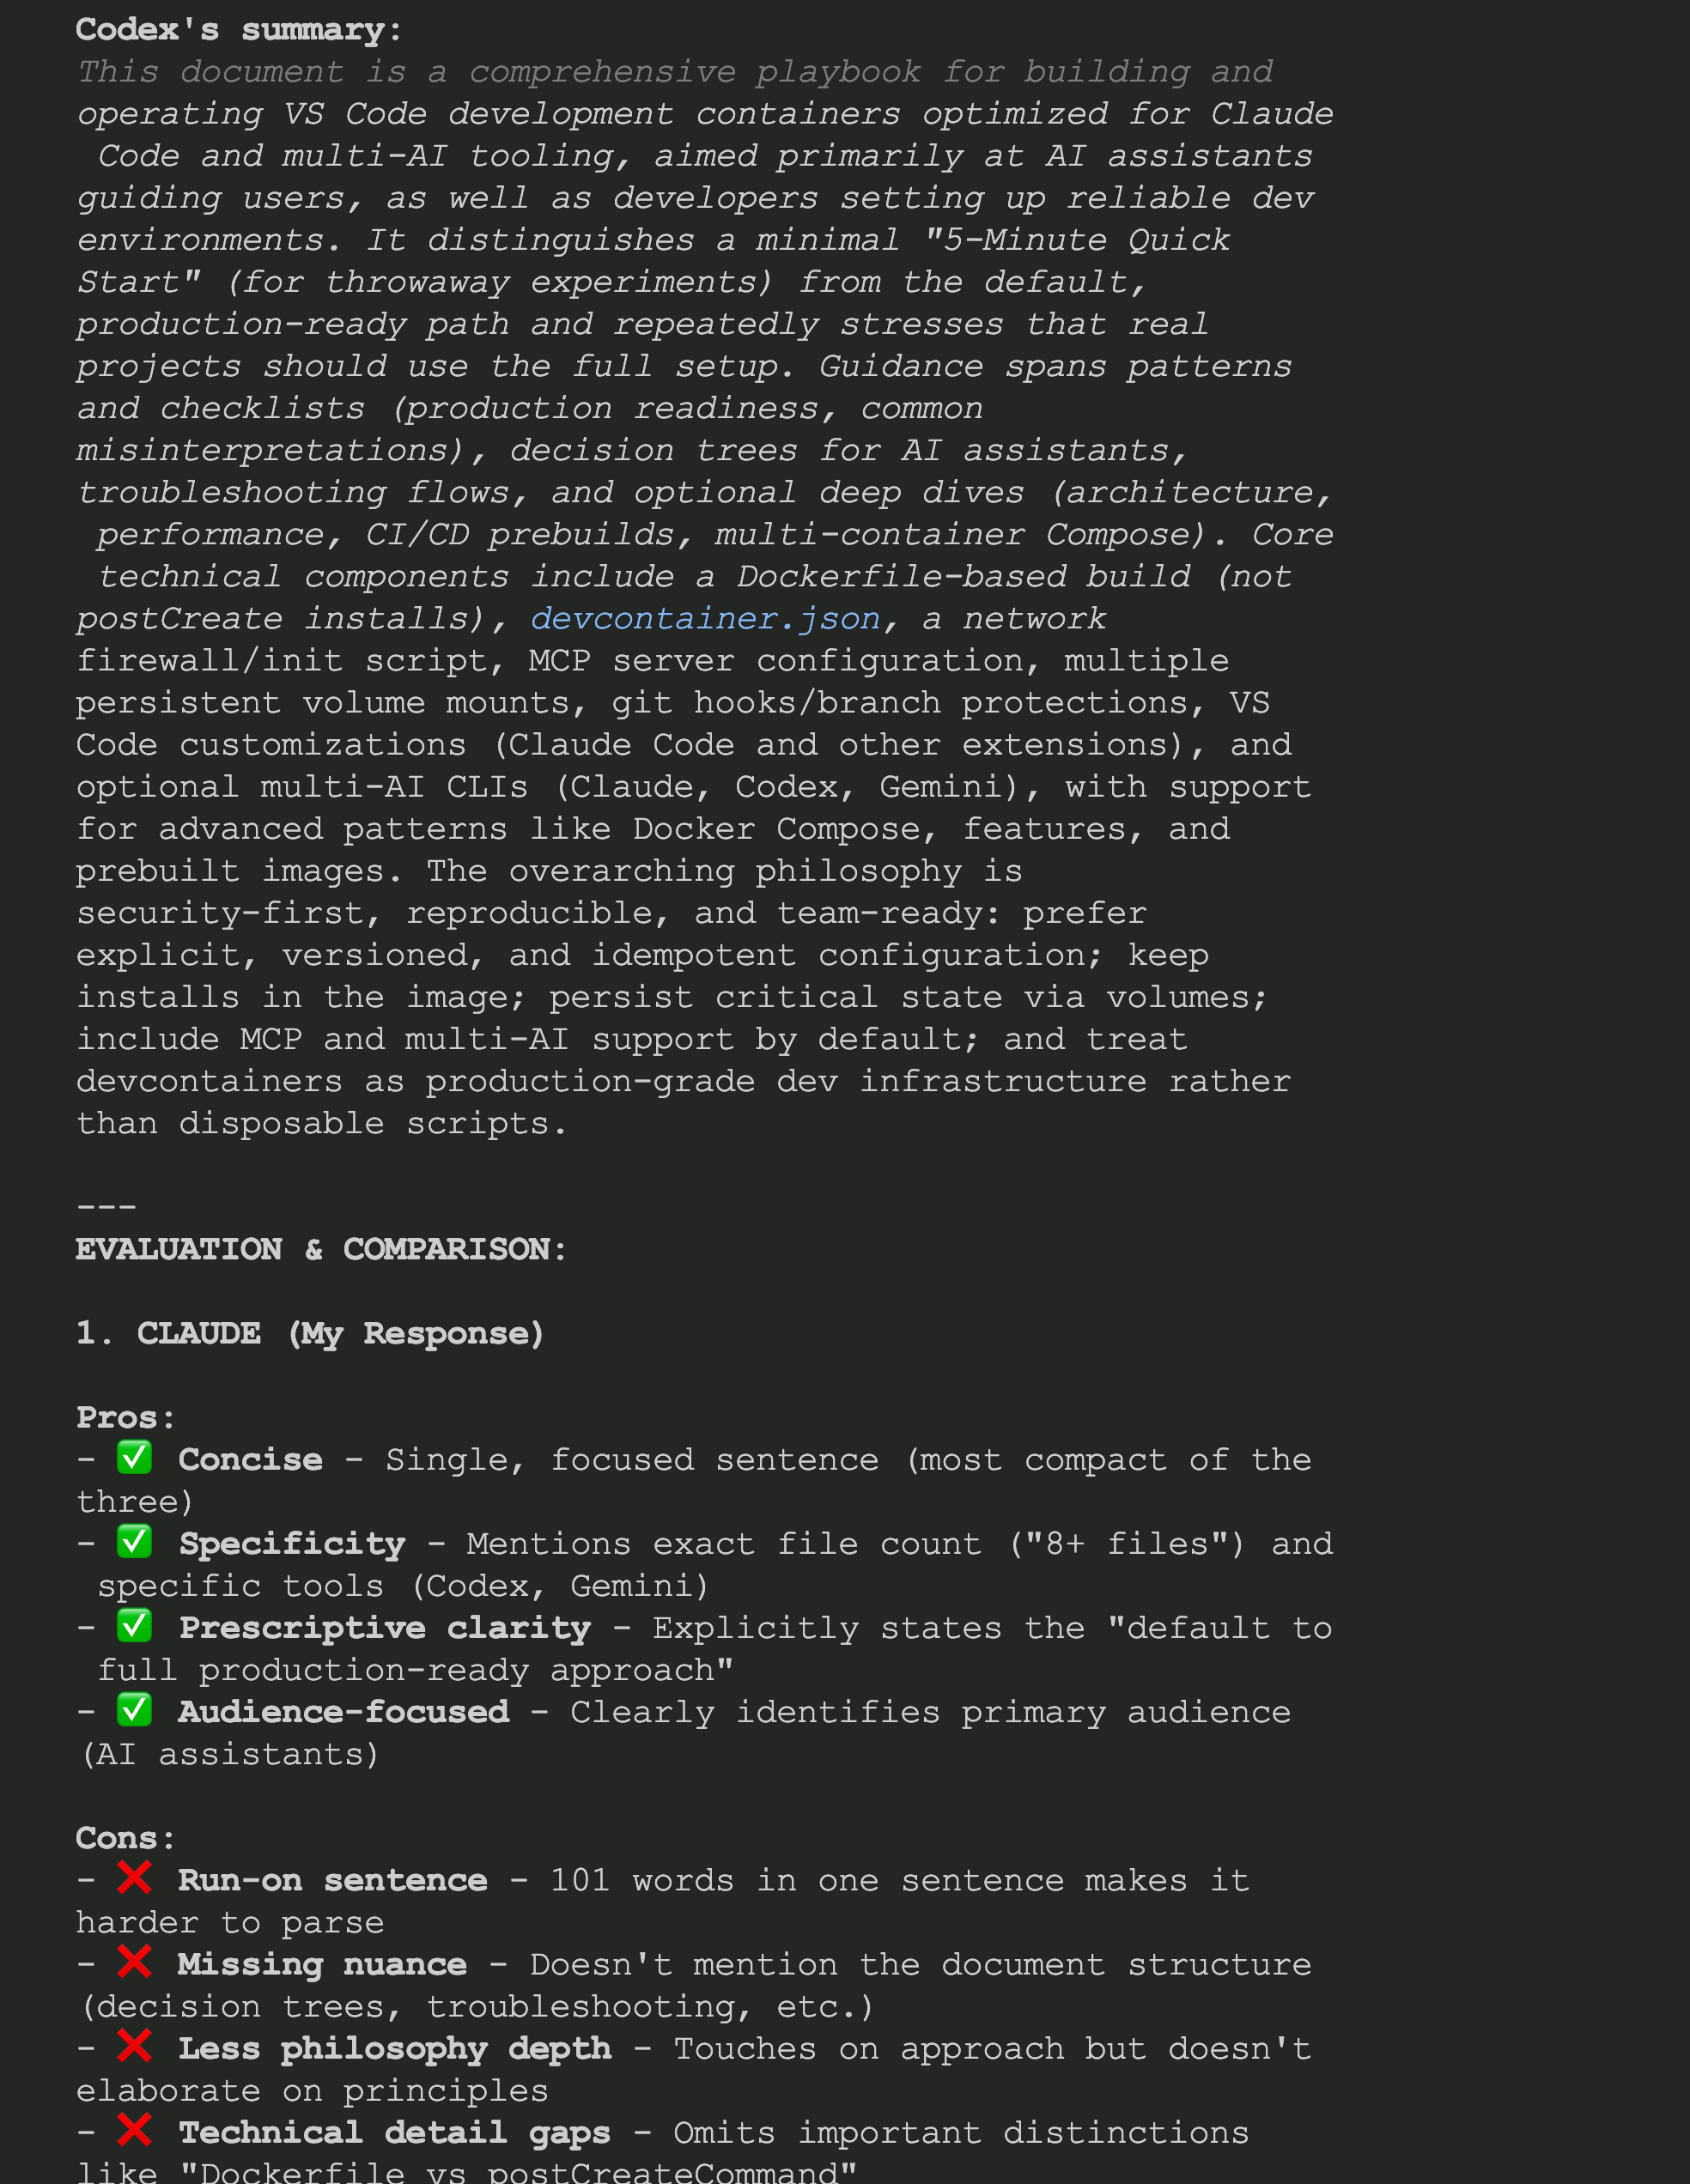
Step 3: Claude invokes Gemini CLI to get Google's analysis
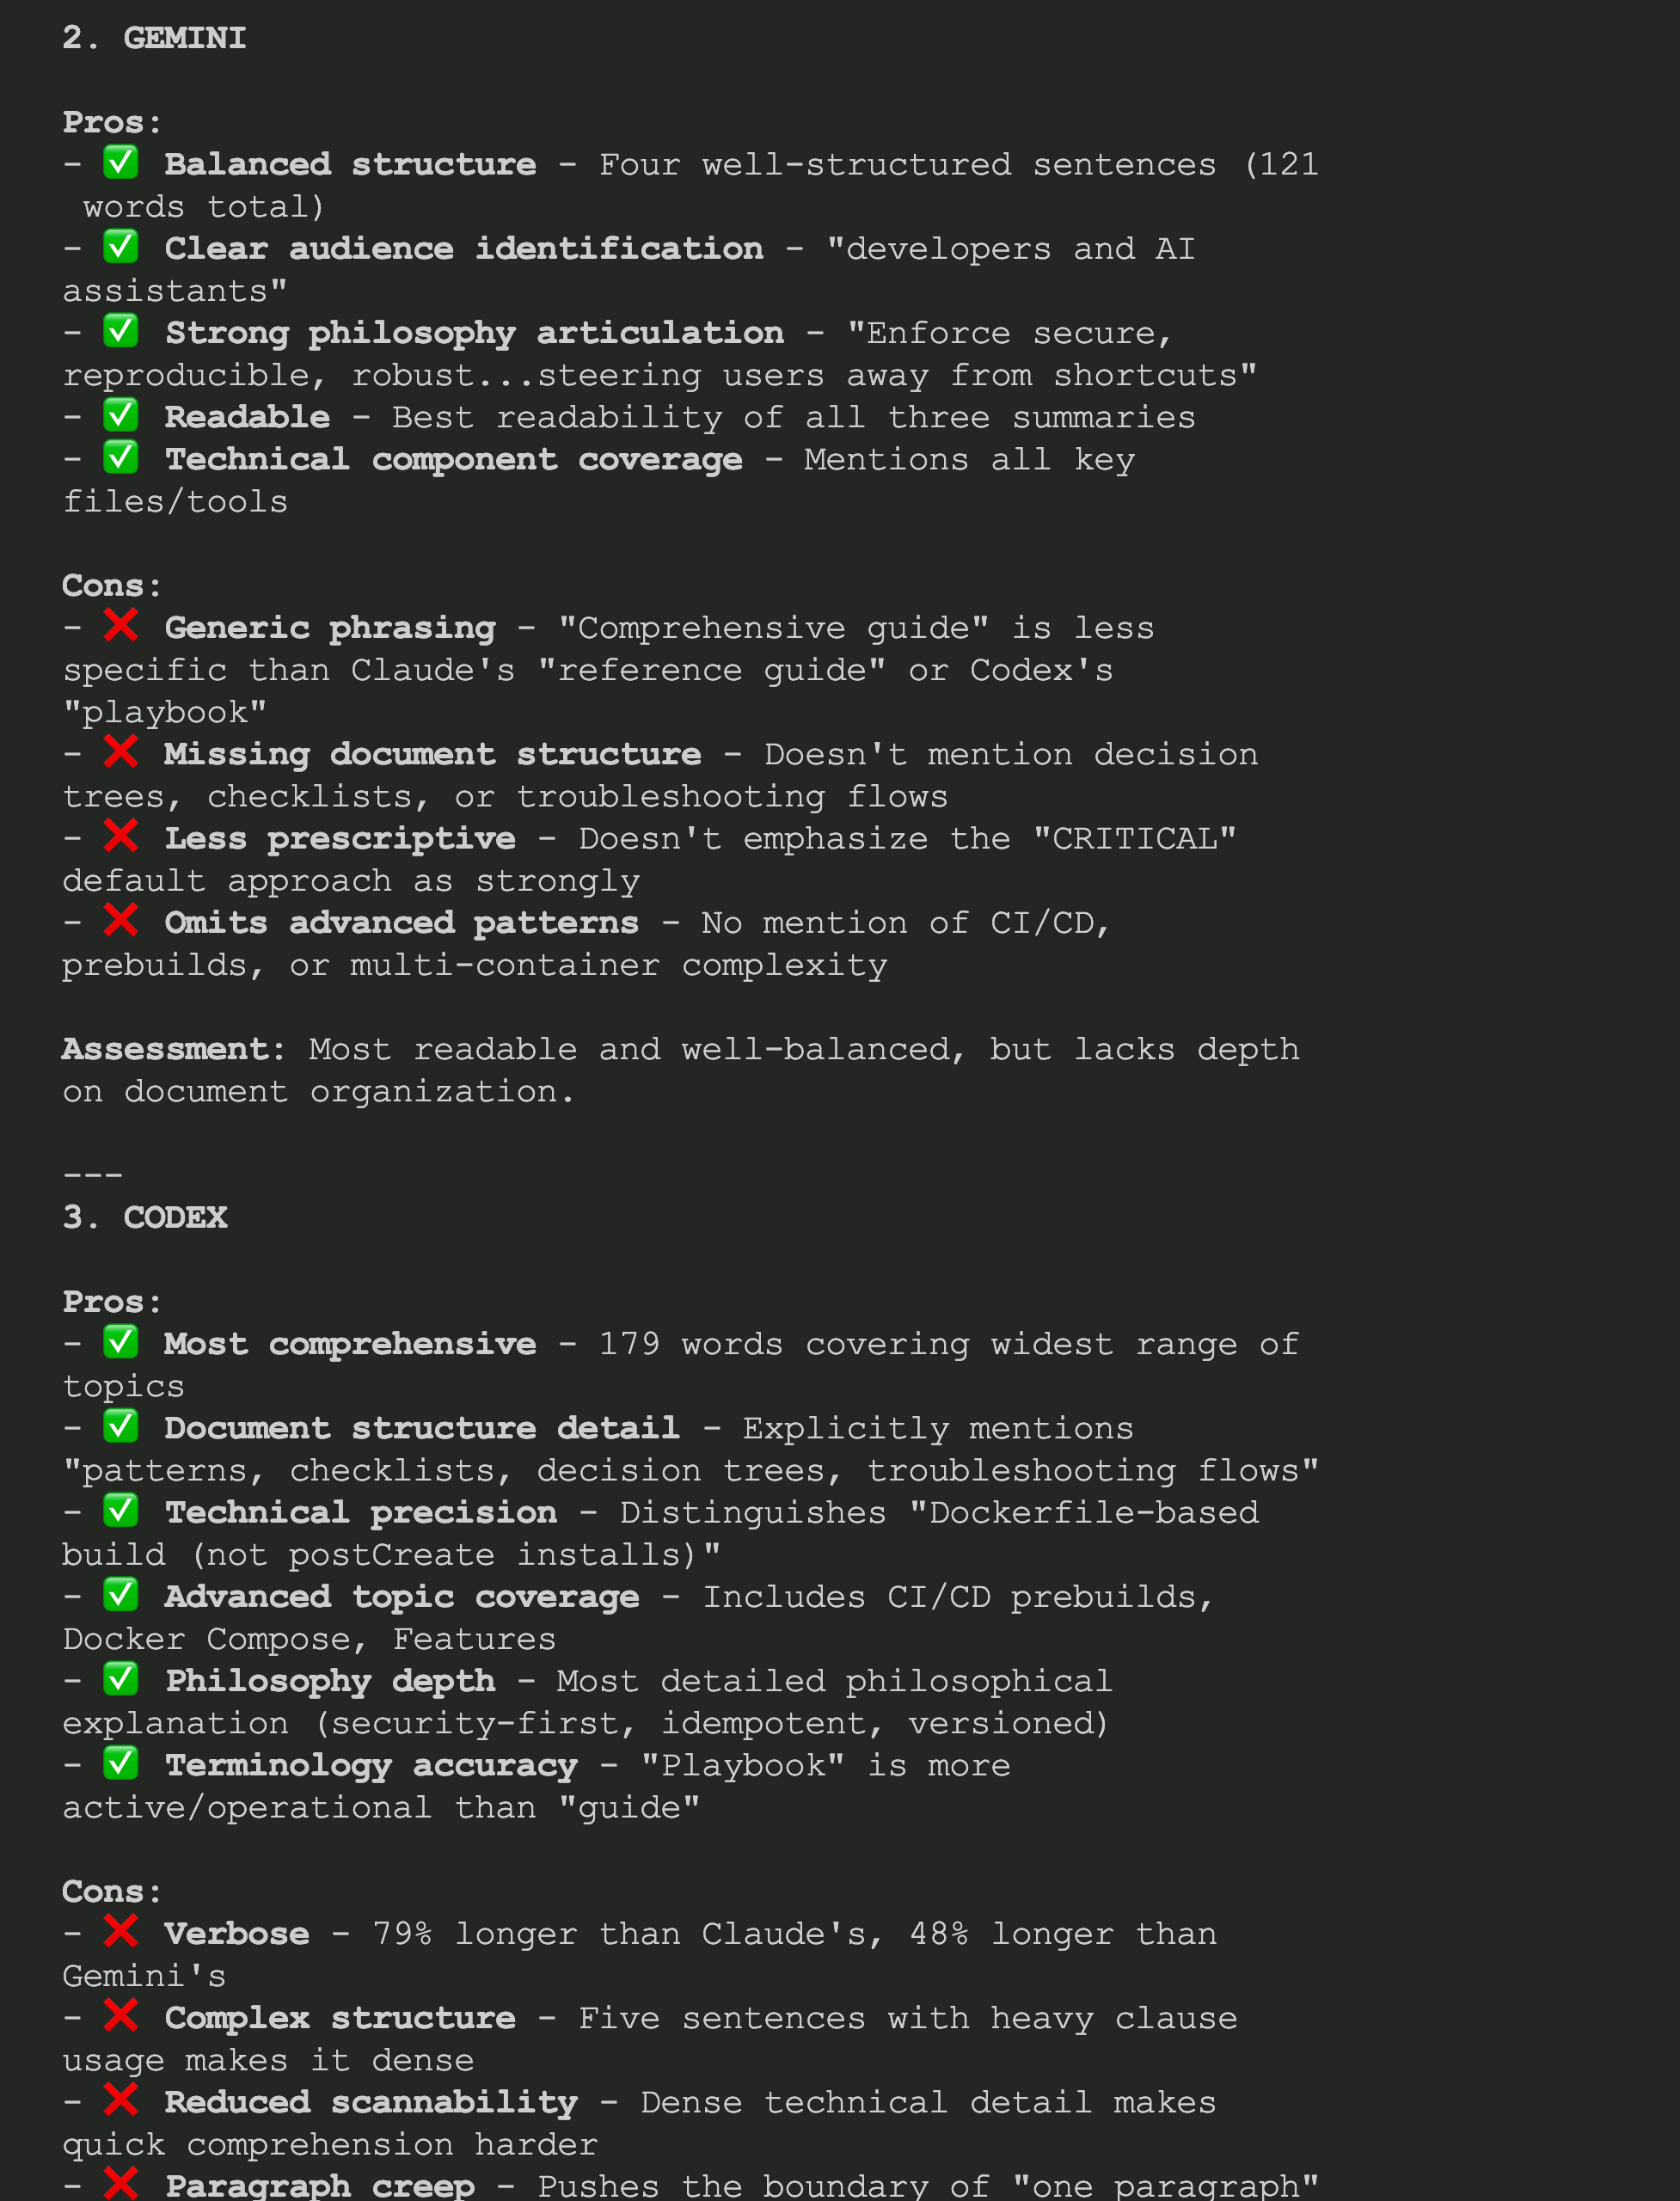
Step 4: Claude analyzes responses from both Codex and Gemini
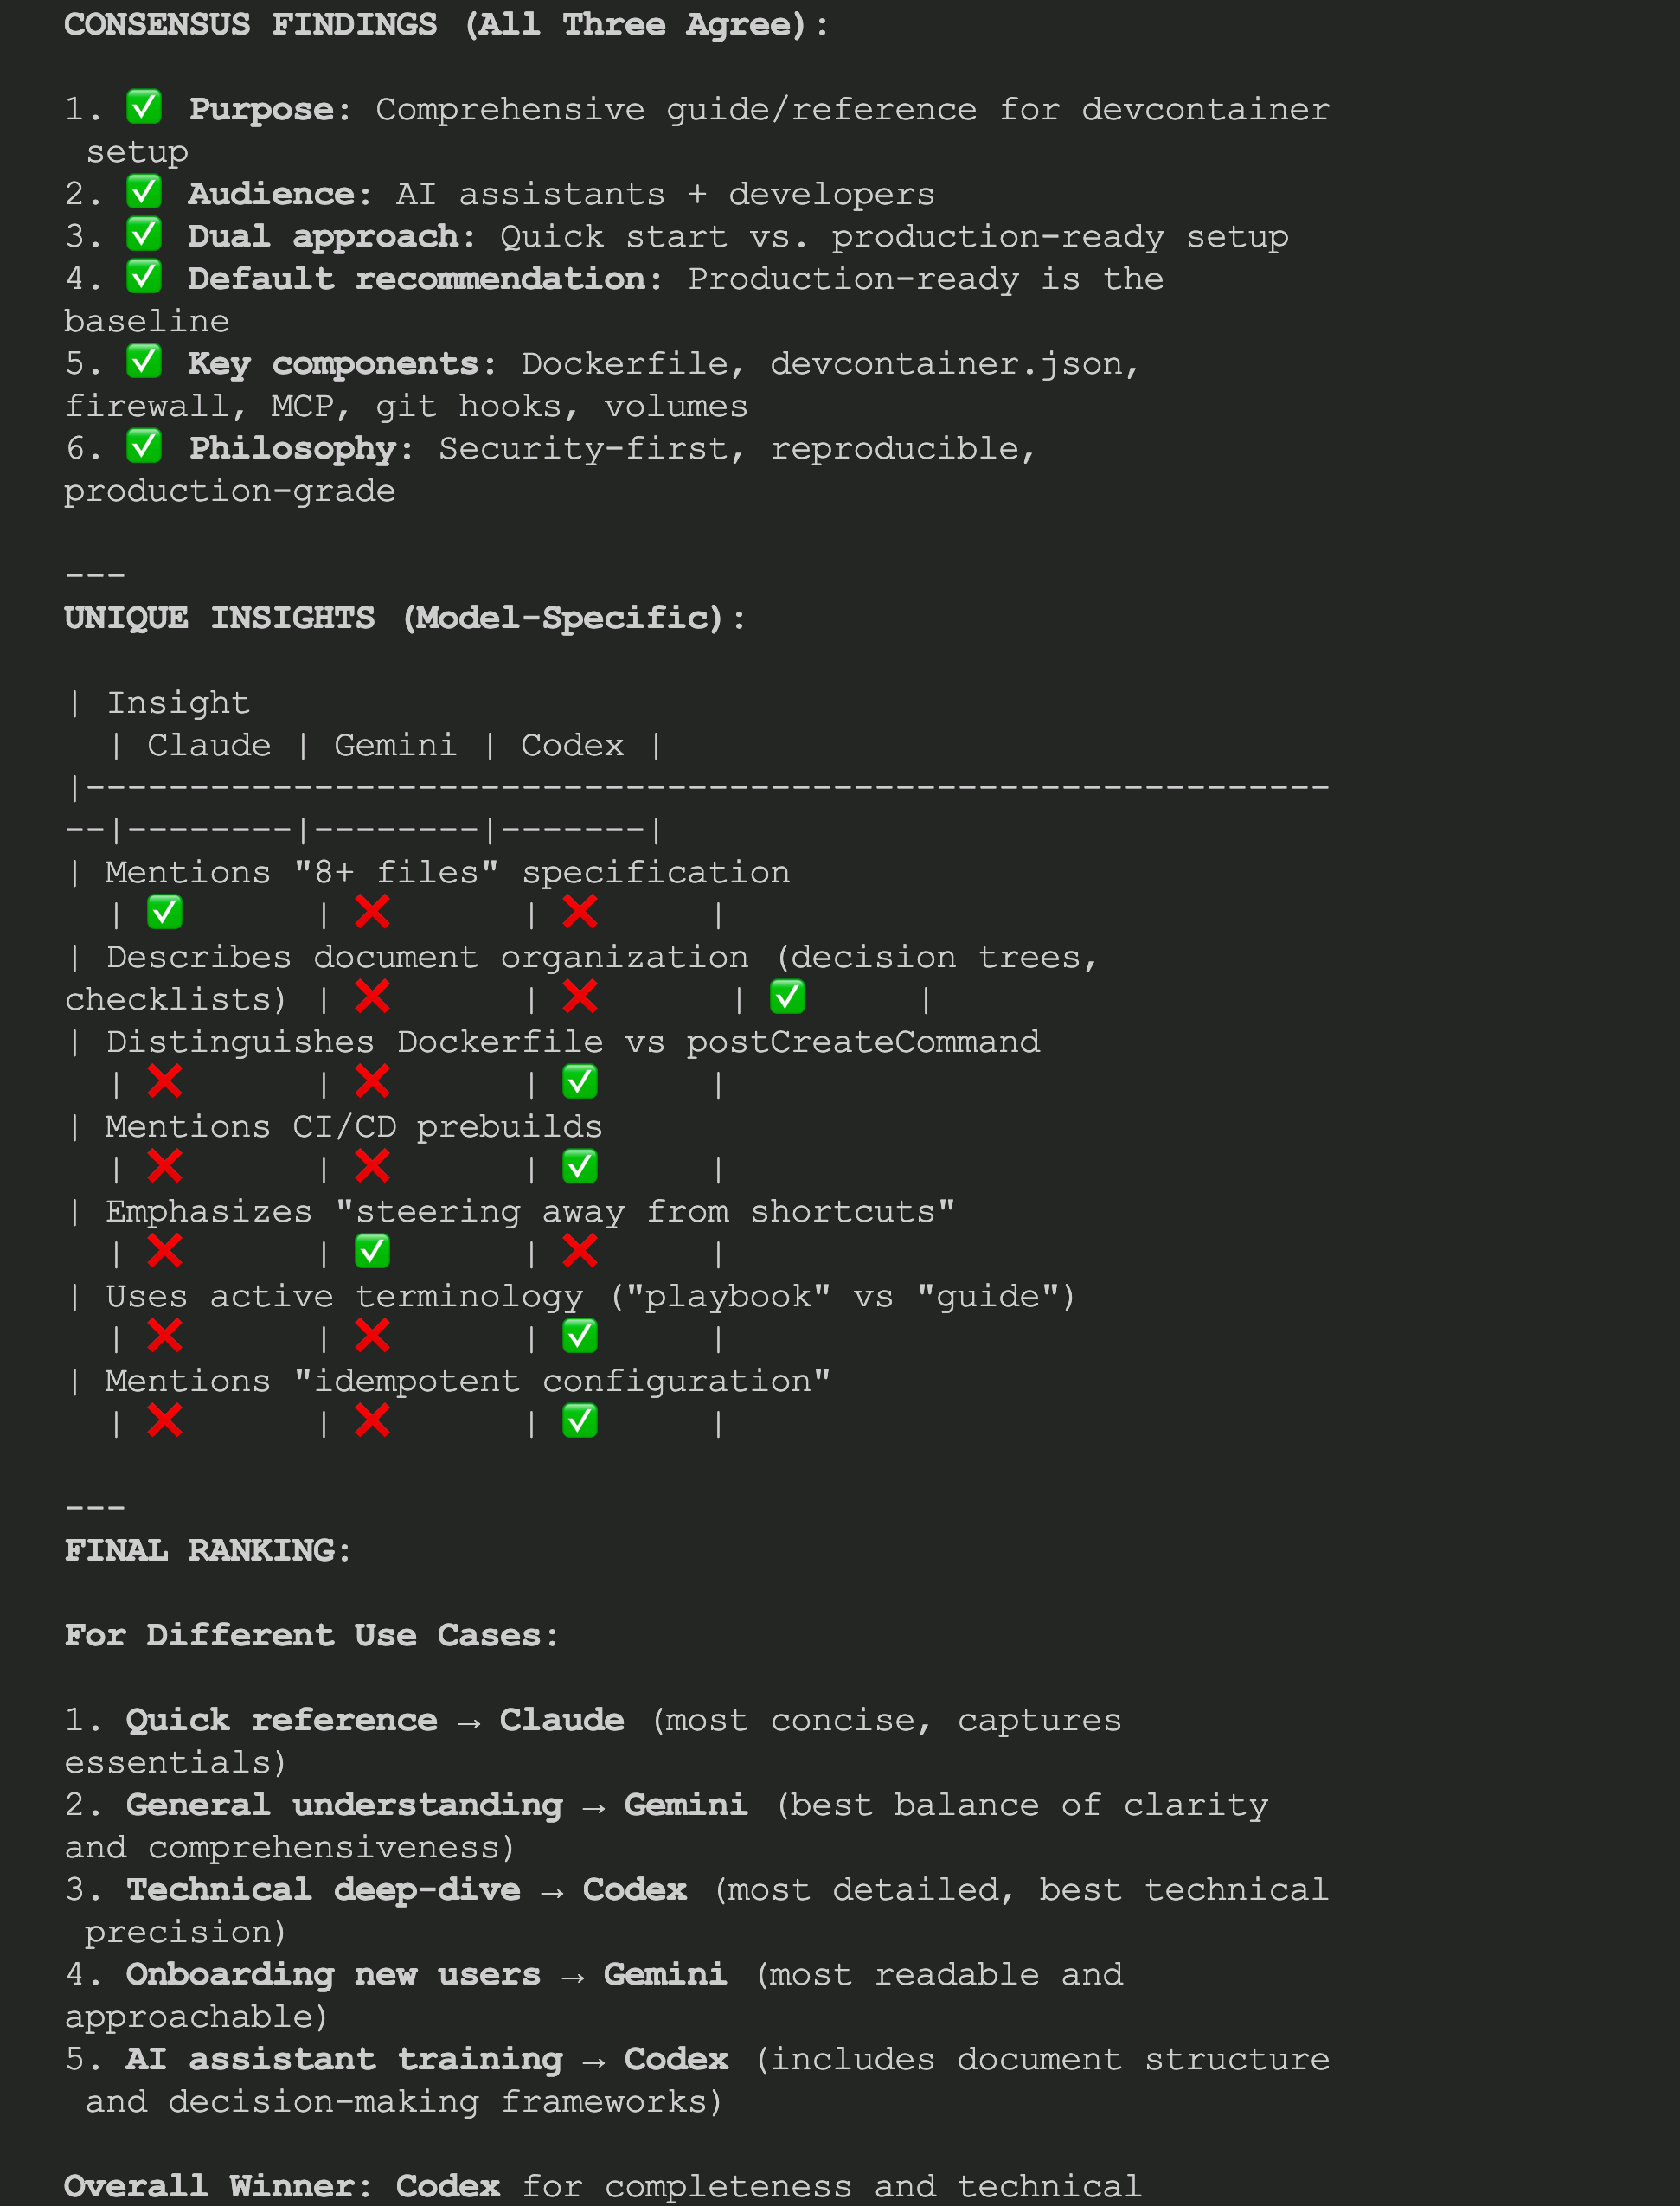
Step 5: Detailed comparison highlighting each model's unique strengths

Step 6: Claude context usage after session
🎯 Key Takeaways:
- Seamless integration: All three AI CLIs work together without conflicts or manual switching
- Automatic orchestration: AI cross-verifier skill handles the coordination logic
- Complementary insights: Each model contributes unique perspectives (Claude for reasoning, Codex for code focus, Gemini for multimodal understanding)
- Production-ready setup: Authentication persists, volumes maintain state, firewall ensures security